How to assign permissions to a user role in ThreatLocker?
This document outlines the step-by-step process of how to assign permissions to a user role in ThreatLocker Dashboard.
This article is a part of our ThreatLocker How-to Guides series, Chapter 09 – User and Device Management.
Introduction
Assigning specific permissions to a user role ensures that users only access the areas of the ThreatLocker Portal relevant to their job. This helps enforce the principle of least privilege and improves security management.
Implementation
Step 1: Access the Role Management Section
- Log in to the ThreatLocker Portal.
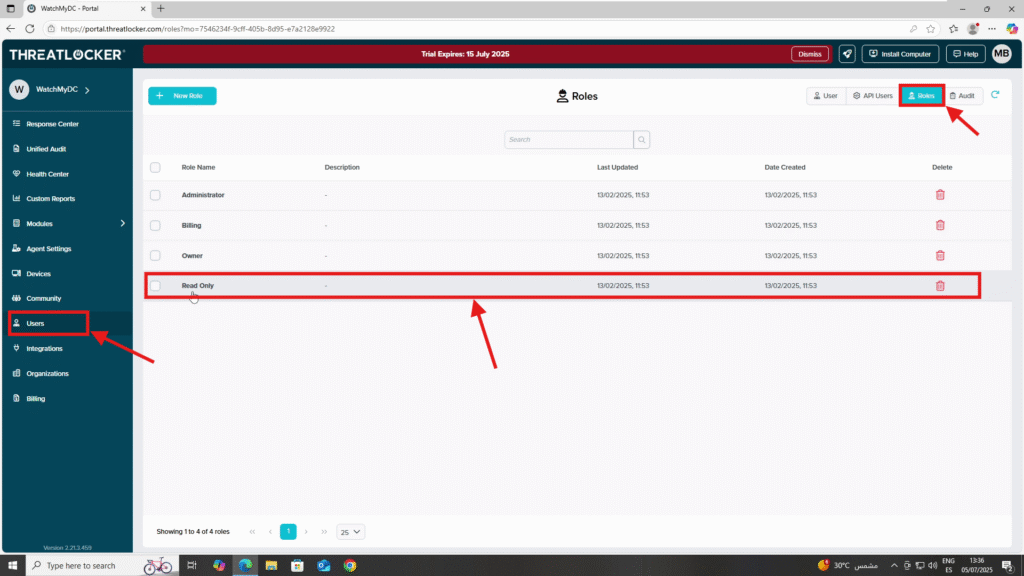
- Navigate to Users > Roles
- Locate the role you want to update and click on it to edit

Step 2: Assign Permissions to the Role
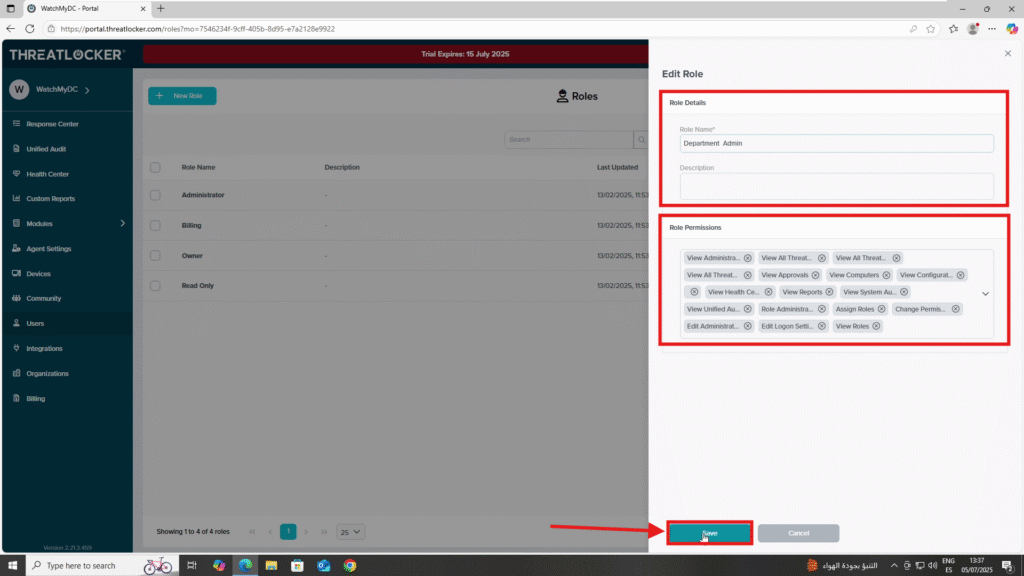
- After clicking on the role, a role editing window will appear
- You can change the name or description of the role if needed
- In the Permissions section, add the desired permissions
- You’ll see permission categories such as:
- Approval Permissions
- Administrator Permissions
- Application Control Permissions
- Billing Permissions
- Computer Permissions
- General Permissions
- Network Control Permissions
- Organization Permissions
- Storage Control Permissions
- Master Only Permissions
- Configuration Manager Permissions
- ThreatLocker Detect Permissions
- Maintenance Mode Permissions
- Web Control Permissions
- Endpoint Detect Permissions
- Cloud Detect Permissions
- Cloud Control Permissions
- Mobile Permissions
- Agent Settings Permissions
Once you’ve added the necessary permissions, click Save to apply the changes.

Conclusion
Assigning permissions to a user role in ThreatLocker allows you to define exactly what actions users with that role can perform. By carefully selecting permissions across categories like Application Control, Network Control, and Storage Control, you can align access with each user’s responsibilities. This ensures better security, easier management, and compliance with the principle of least privilege.
