How to assign policies by department in ThreatLocker?
This document outlines the step-by-step process of how to assign policies by department in ThreatLocker Dashboard.
This article is a part of our ThreatLocker How-to Guides series, Chapter 08 – Policy Management.
Introduction
Applying security policies based on departments allows you to tailor access controls according to user roles and operational needs.For example, the IT department might require access to administrative tools, while the Finance department should be restricted from using certain scripting utilities.
Using Device Groups in ThreatLocker, you can apply specific policies to targeted departments.
Implementation
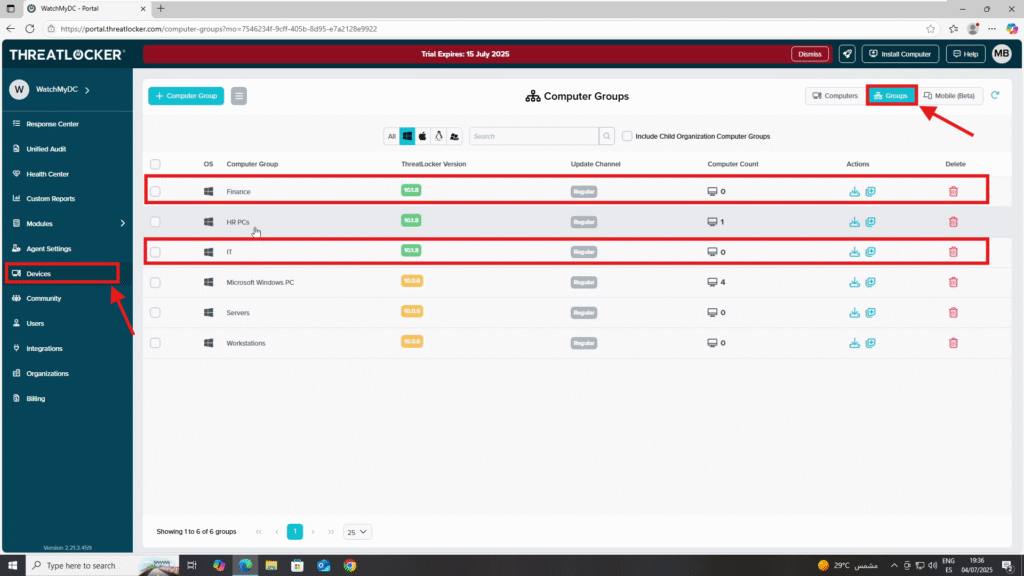
Step 1: Confirm That the Department Group Exists
- Log in to the ThreatLocker Portal.
- Navigate to Devices > Groups
- Confirm that the required department groups (e.g., IT, Finance) already exist
- If not, click Create Group to set them up (see: How to Create Policy Groups)
Step 2: Create Department-Specific Policies
- In this example, we’ll create:
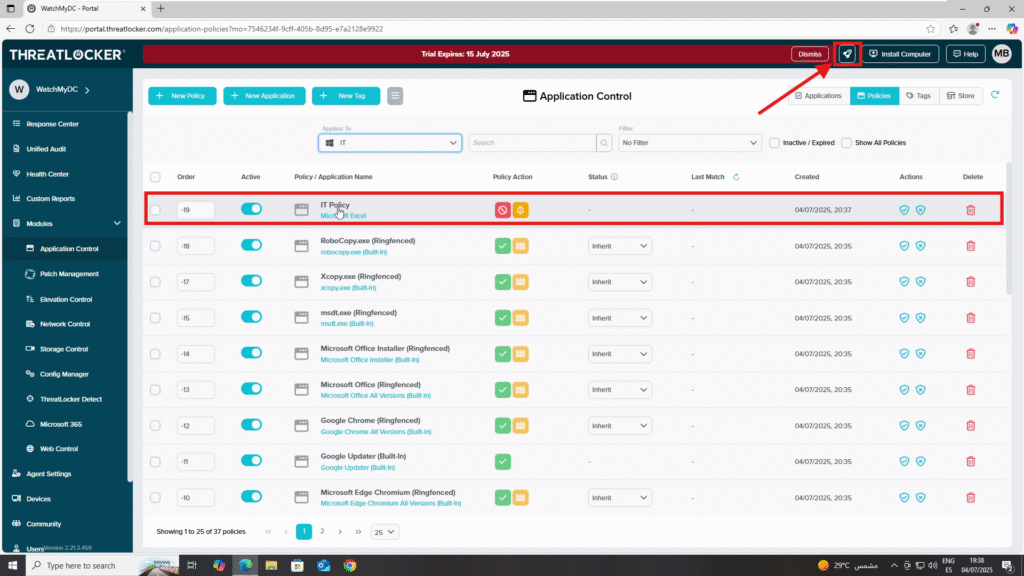
- A policy for the IT department to deny access to Excel
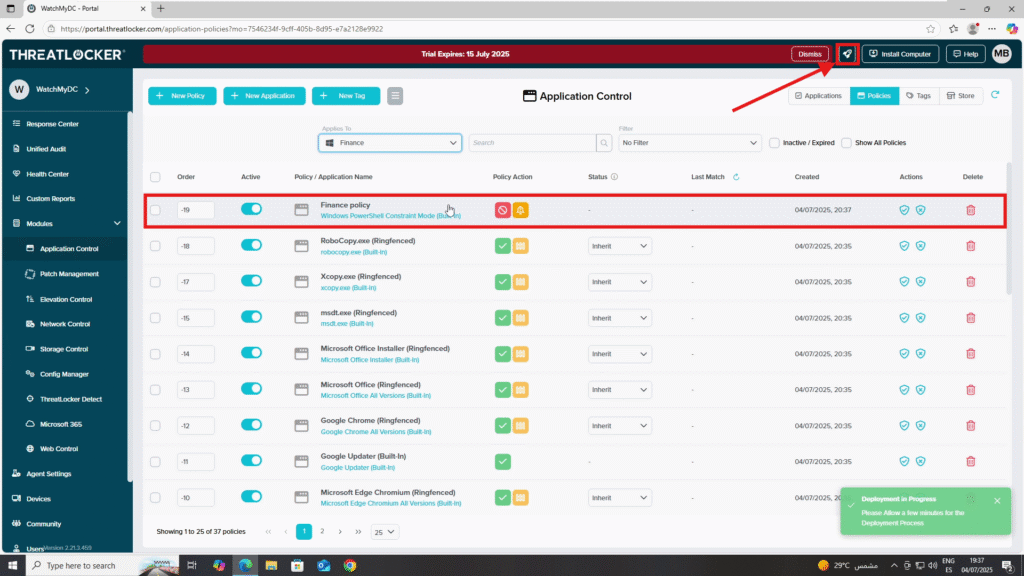
- A policy for the Finance department to deny access to PowerShell
- Policy 1: Deny Excel for IT Department
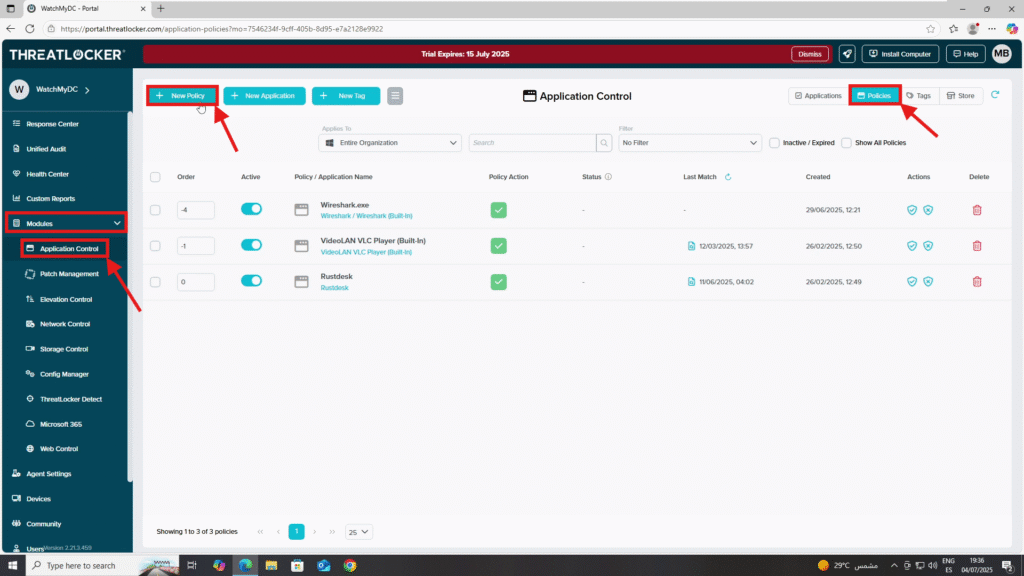
- Navigate to Modules > Application Control > Policies
- Click Create Policy
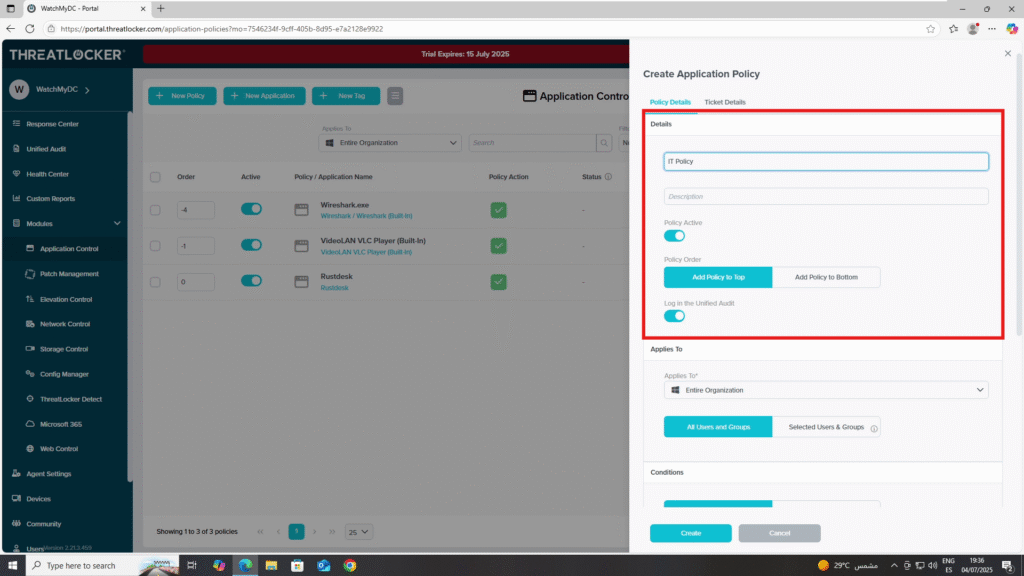
- Details Section
- Name: Deny Excel – IT
- Description: Restrict Excel access for IT department
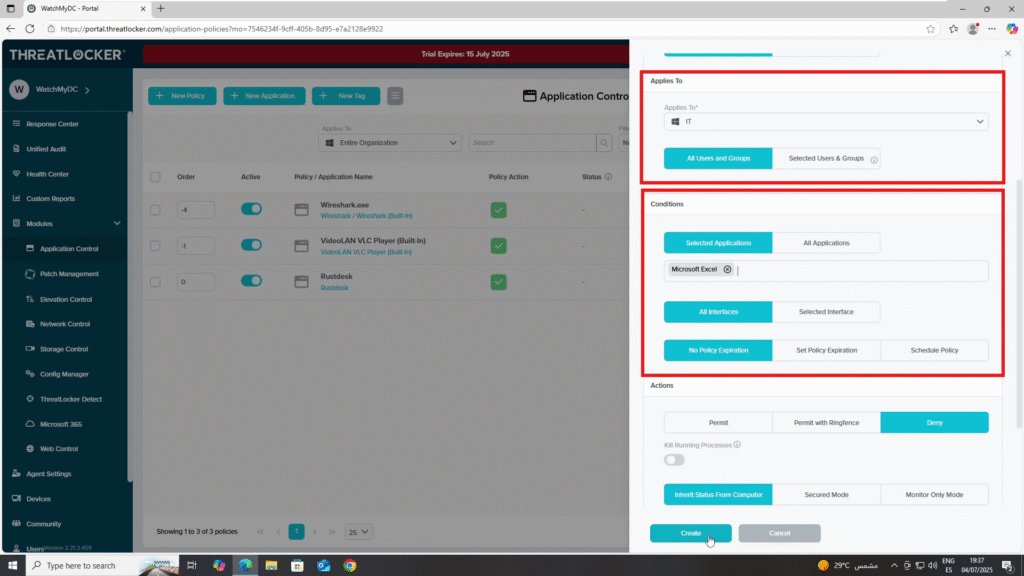
- Applied To Section
- Select the IT department group
- Condition Section
- Select the application: Microsoft Excel
- Action Section
- Set Action to: Deny
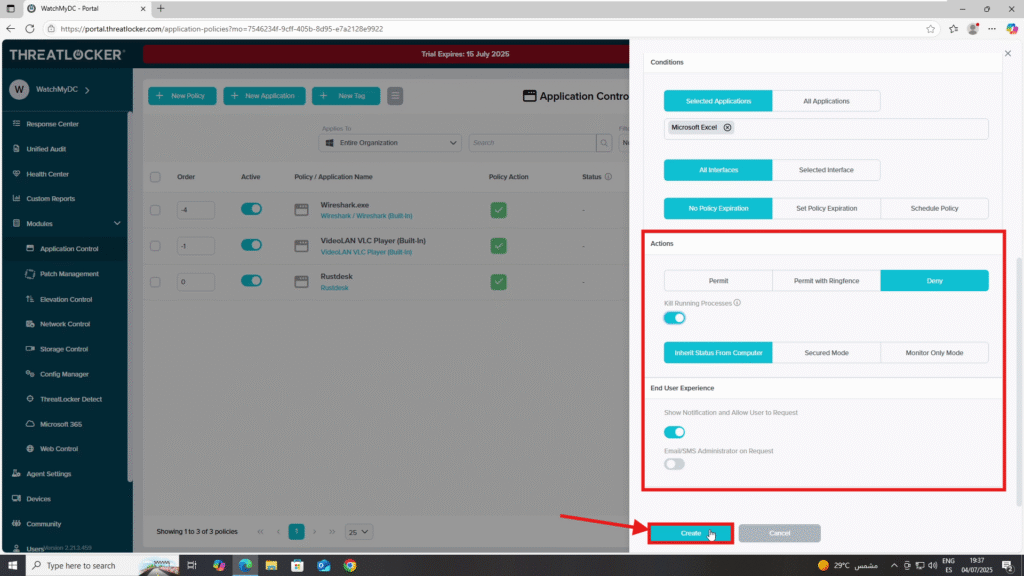
When all fields are configured, click Create:

- Policy 2: Deny PowerShell for Finance Department
- Click Create Policy again
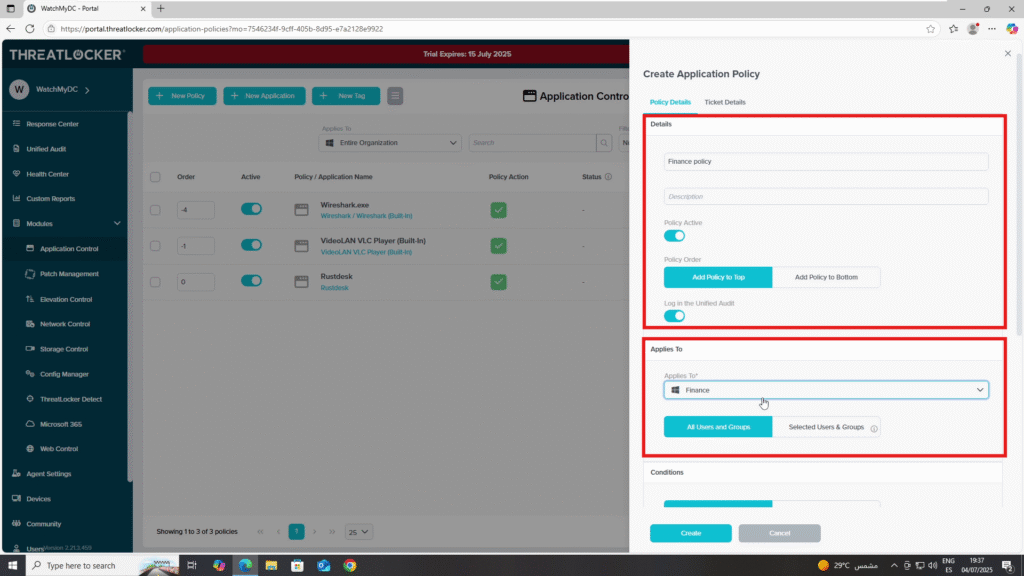
- Details Section
- Name: Deny PowerShell – Finance
- Description: Restrict PowerShell access for Finance department
- Applied To Section
- Select the Finance department group
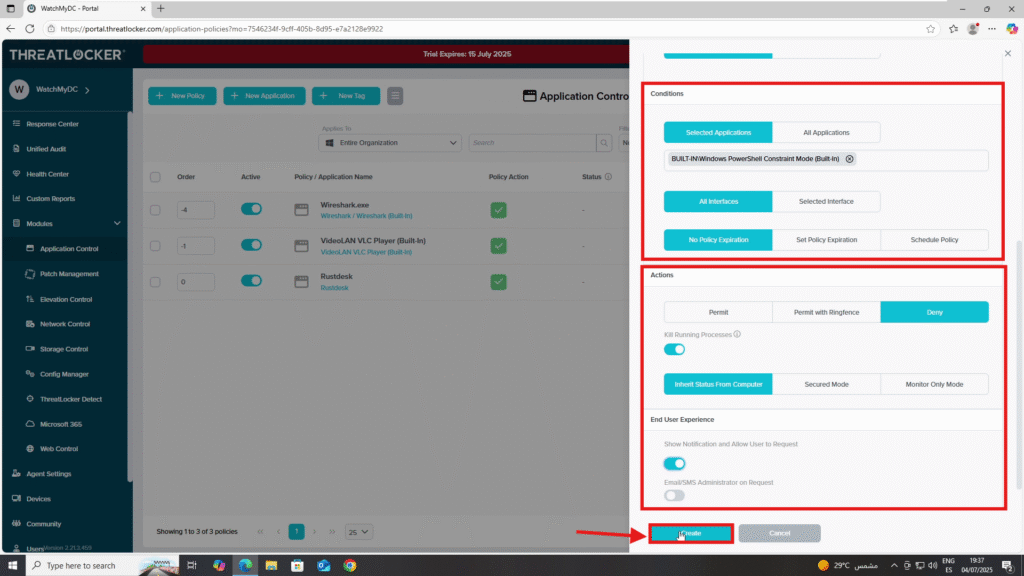
- Condition Section
- Select the application: PowerShell
- Action Section
- Set Action to: Deny
When all fields are configured, click Create:
Step 3: Deploy the Policies to assign policies by department in ThreatLocker
Then, click Deploy to apply the updated policy.
Conclusion
By assigning policies to specific department groups, you can enforce role-based access control that aligns with operational requirements and reduces risk.
ThreatLocker makes it easy to isolate rules by department, giving you the flexibility to allow or block applications based on team functions.
