How to configure ThreatLocker SSO with Azure AD?
This document outlines the step-by-step process of how to use ThreatLocker SSO with Azure AD.
This article is a part of our ThreatLocker How-to Guides series, Chapter 12 – Integration & Third-party Tools.
Introduction
Single Sign-On (SSO) allows users to log in to ThreatLocker using their Azure Active Directory credentials. This improves security and simplifies the login process.
Implementation
Step 1: Enable SSO in ThreatLocker User Settings
- Log in to the ThreatLocker Portal.
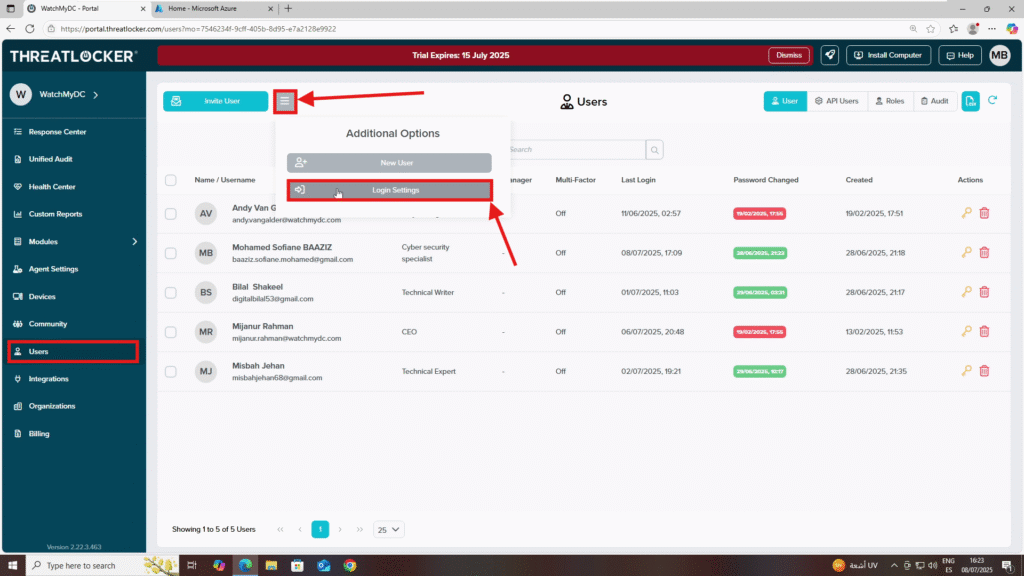
- Navigate to Users.
- In the Users section, click the three lines menu at the top of the page and select Login Settings.
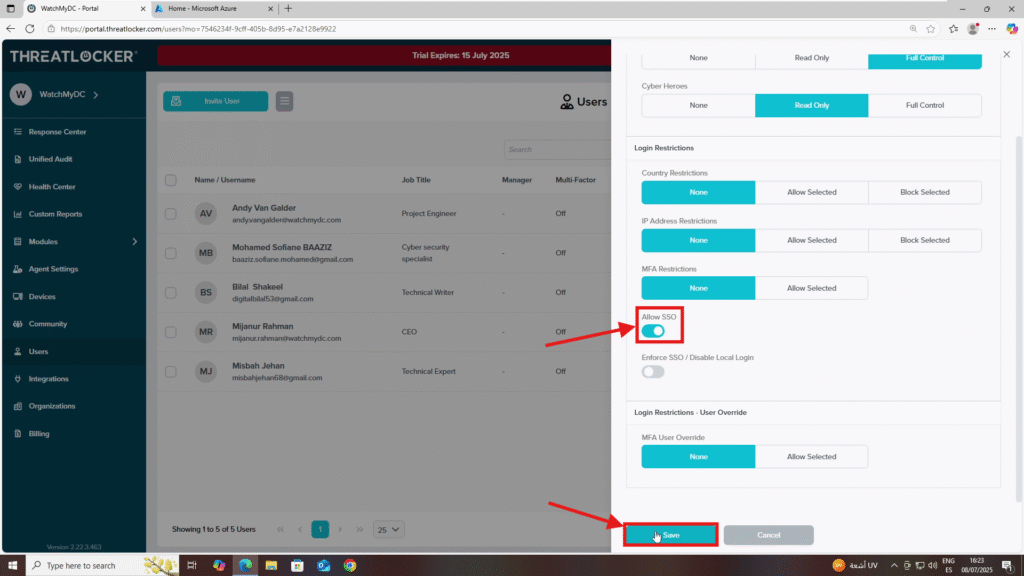
4. In the Login Restrictions section, enable Allow SSO.
Step 2: Activate SSO in Azure
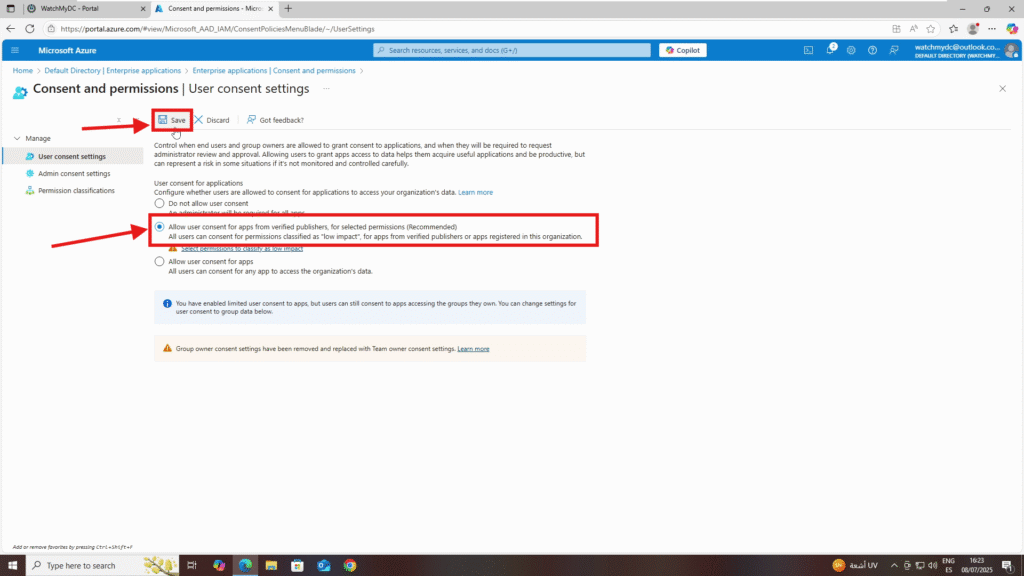
- Log in to the Azure Portal.
- Navigate to Microsoft Entra ID > Enterprise Applications > Consent and Permissions.
- Enable: Allow user consent for apps from verified publishers for selected permissions (recommended).
- Click Save to apply the changes.
Step 3: Activate SSO in Azure
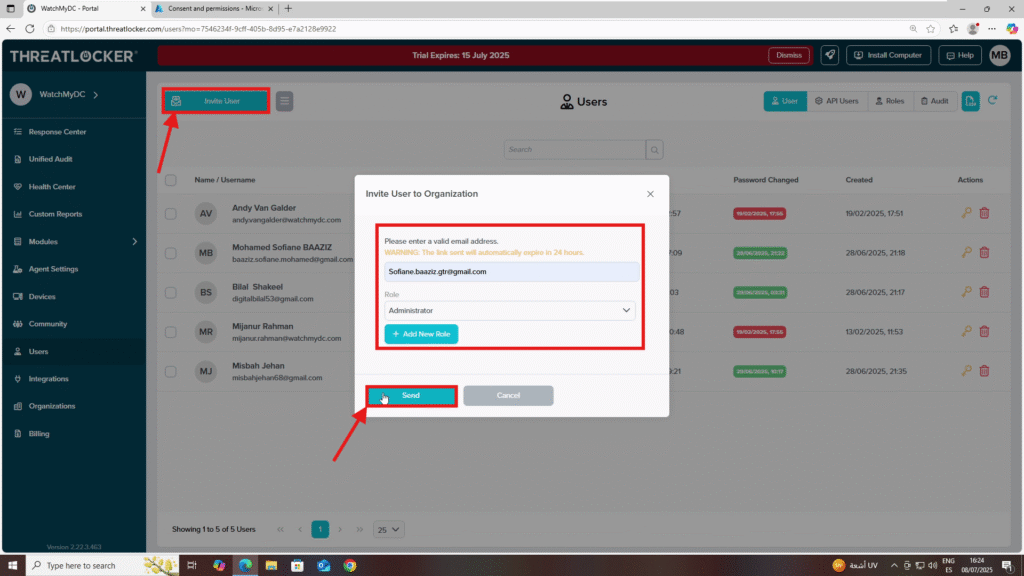
- In ThreatLocker, go to Users and click Invite User.
- Fill in the form with the email address and role you want to assign to the user.
- Click Send.
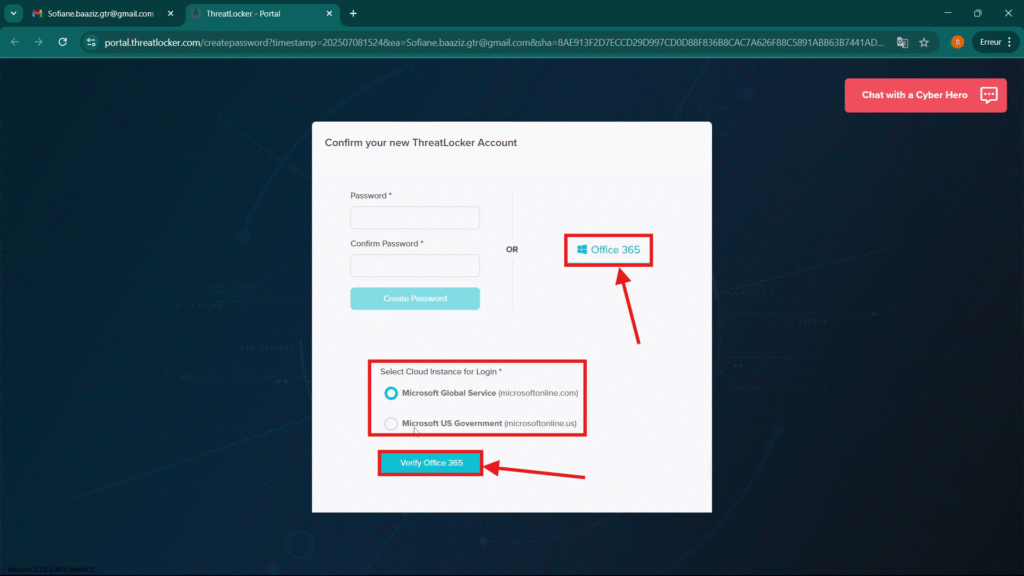
4. When the invited user receives the email, they should click the invitation link. They will then be prompted to set a password or verify their account via Office 365 login.
Conclusion
Once configured, users can log in to ThreatLocker seamlessly using their Azure AD credentials. This setup enhances both security and ease of access.
