How to create a computer group in ThreatLocker?
This document outlines the step-by-step process of how to create a computer group in ThreatLocker Dashboard.
This article is a part of our ThreatLocker How-to Guides series, Chapter 09 – User and Device Management.
Introduction
Computer groups in ThreatLocker allow you to organize devices by department, function, or configuration requirements. Grouping devices makes it easier to apply consistent security policies and manage them centrally.
Implementation
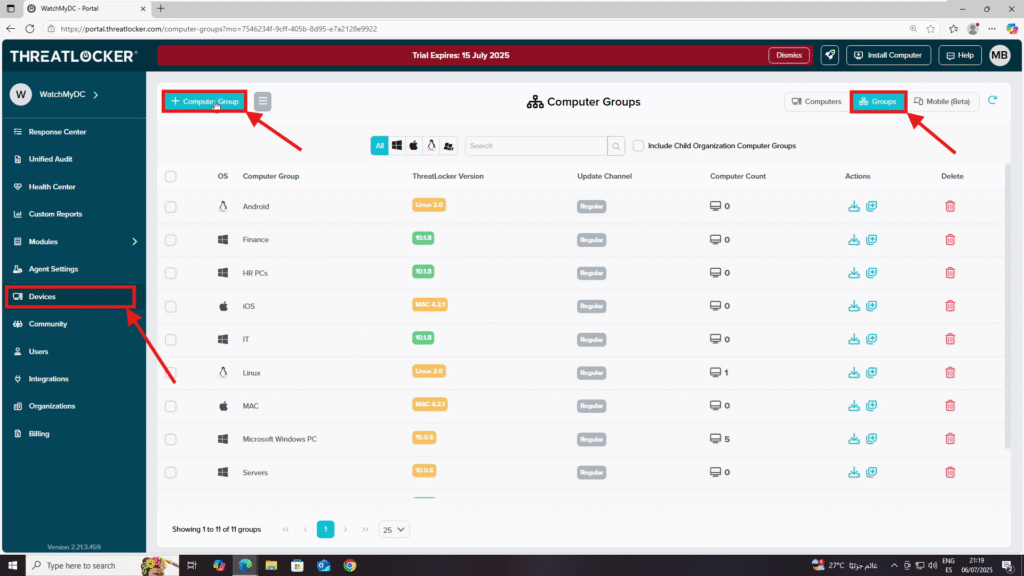
Step 1: Access the Computer Management Section
- Log in to the ThreatLocker Portal.
- Navigate to Devices > Groups.
- Click + Computer Group to begin creating a new group
Step 2: Create a Computer Group
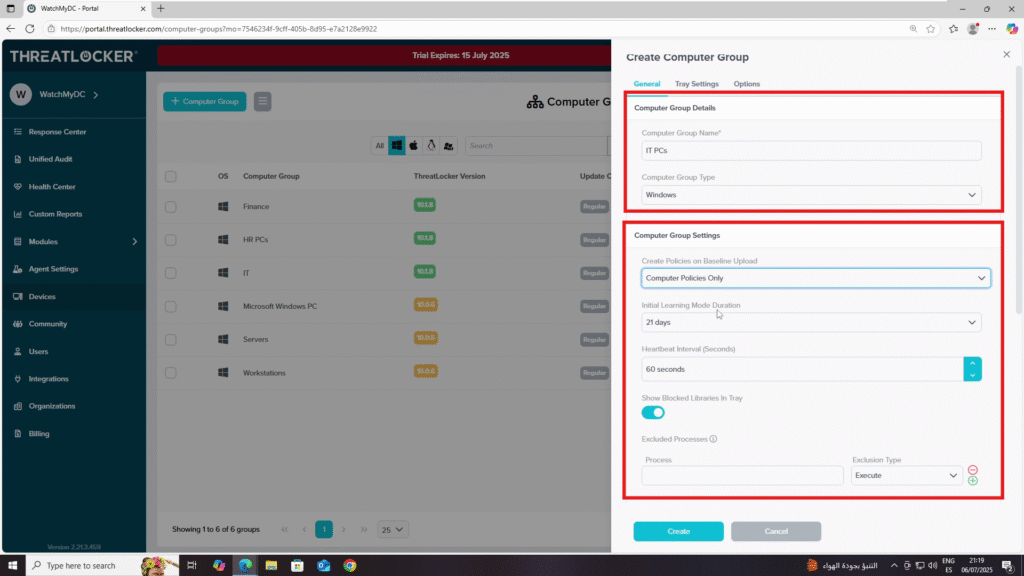
- After clicking the button, a Create Computer Group window will appear.
- Fill out the form:
- Computer Group Details:
- Computer Group Name: For example, IT PCs
- Computer Group Type: Select the appropriate OS type: Windows, macOS, Linux, Windows XP
- Computer Group Settings:
- Create Policies On: Choose Baseline Upload to Computer Policies Only
- Initial Learning Mode Duration: Set the number of days (e.g., 15, 21)
- Heartbeat Interval (seconds): Recommended values are 60 or 30 depending on how frequently the computer should report
- Excluded Libraries in Try and Baseline All Paths Except: Add paths you want to exclude if needed
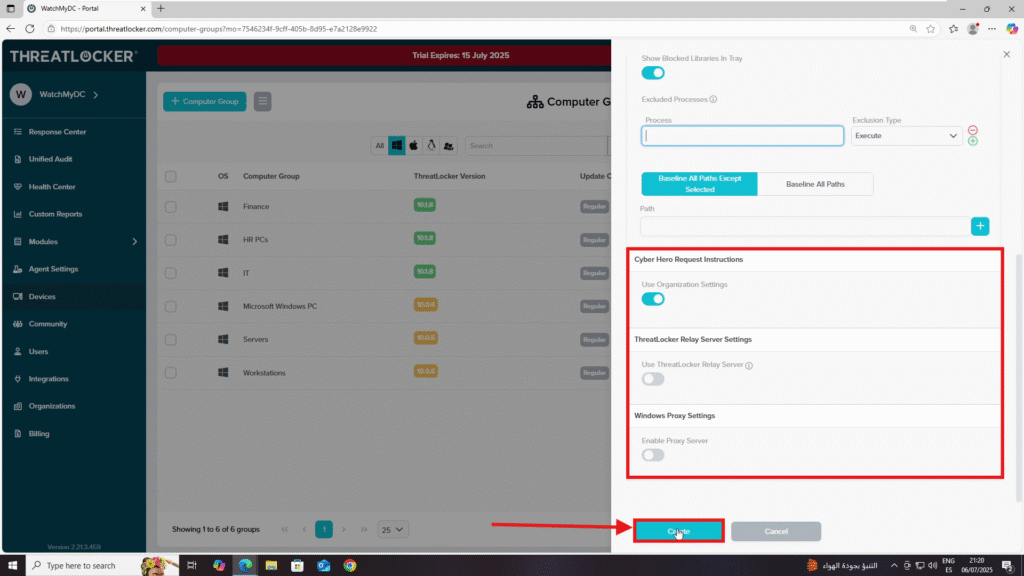
- Optional Settings
- Cyber Hero Request Instructions: Enable if you want to define special handling for Cyber Hero requests
- ThreatLocker Relay Server Settings: Activate if you’re using a relay server
- Windows Proxy Settings: Enable proxy configuration if needed.
3. Once all options are configured, click Create
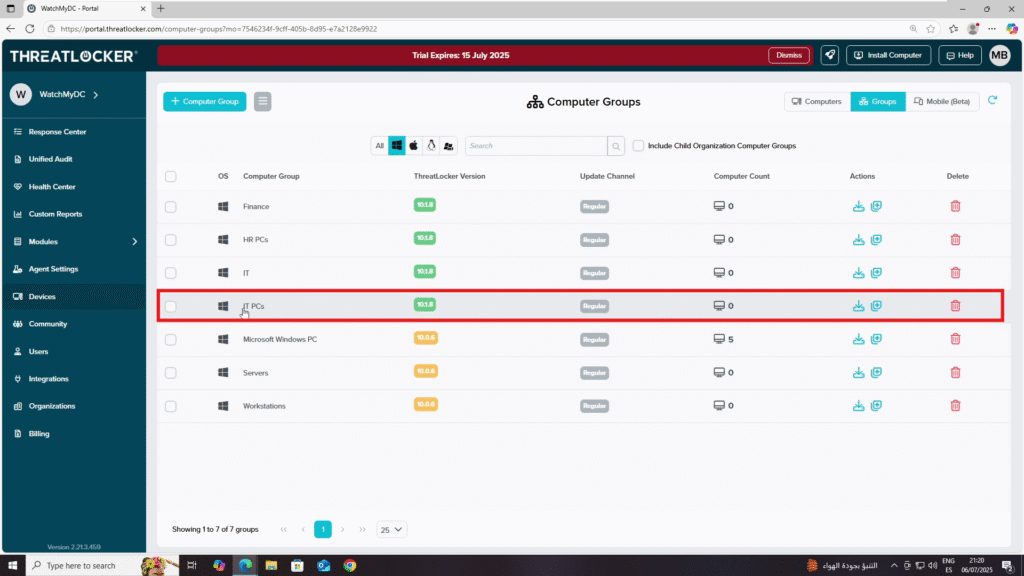
4. The new group will appear in the Computer Groups List
Conclusion
Creating computer groups helps you efficiently manage and assign policies to multiple devices in a structured way. Once configured, these groups streamline security policy deployment and device monitoring.
