How to create policy groups in ThreatLocker?
This document outlines the step-by-step process of how to create policy groups in ThreatLocker Dashboard.
This article is a part of our ThreatLocker How-to Guides series, Chapter 08 – Policy Management.
Introduction
Creating policy groups in ThreatLocker allows you to organize and manage devices more efficiently by applying consistent security policies across similar endpoints (e.g., HR computers, IT laptops, or servers).
This is especially useful when deploying baseline policies, managing learning mode, and streamlining policy enforcement.
Implementation
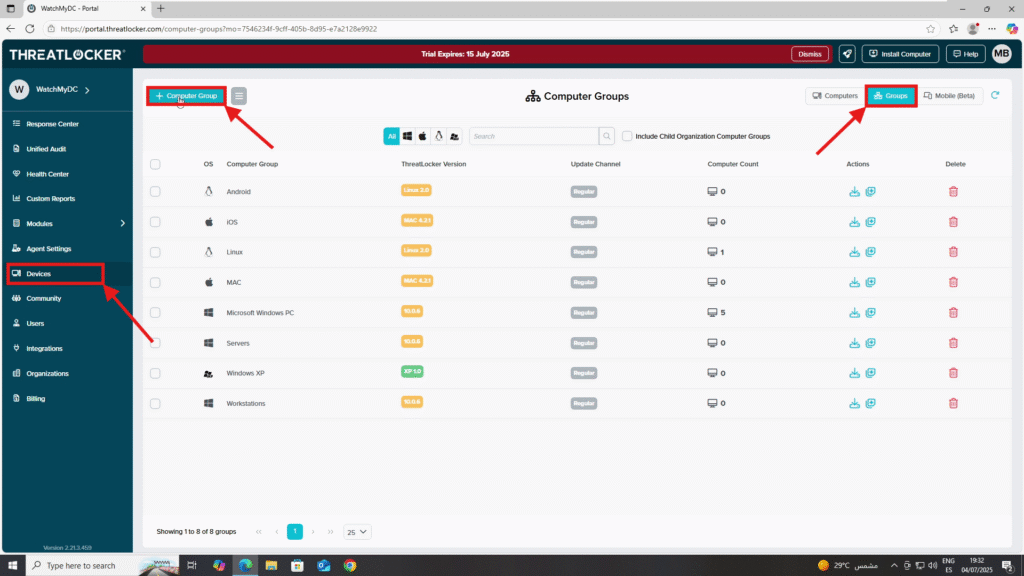
Step 1: Access the Devices Group Section
- Log in to the ThreatLocker Portal.
- Navigate to Devices > Groups
- Click Create Group
Step 2: Fill the Group Creation Form
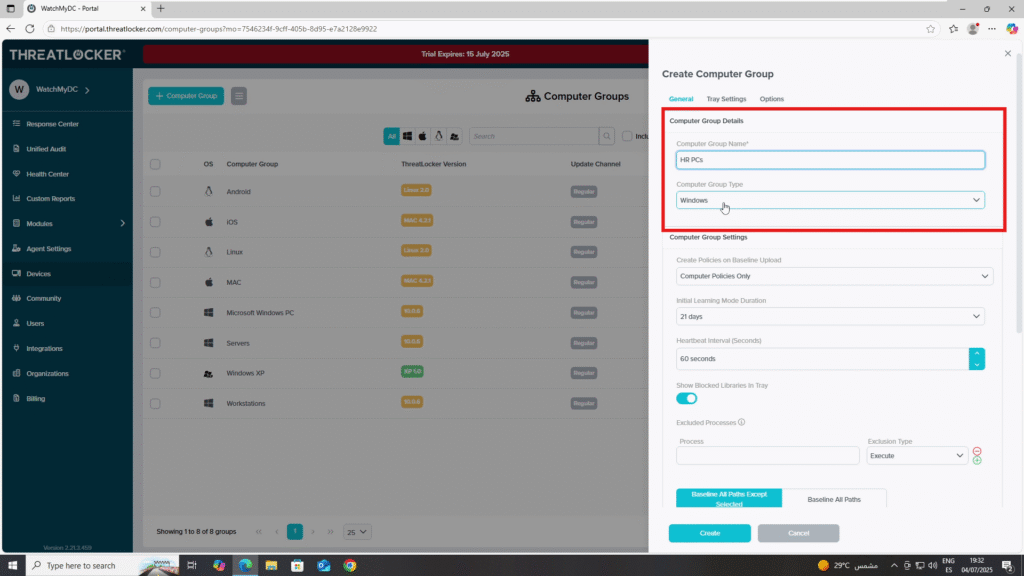
- In the Computer Group Section:
- Computer Group Name: Example: HR PCs
- Select Computer Type: Choose the appropriate OS: Windows, macOS, or Linux.
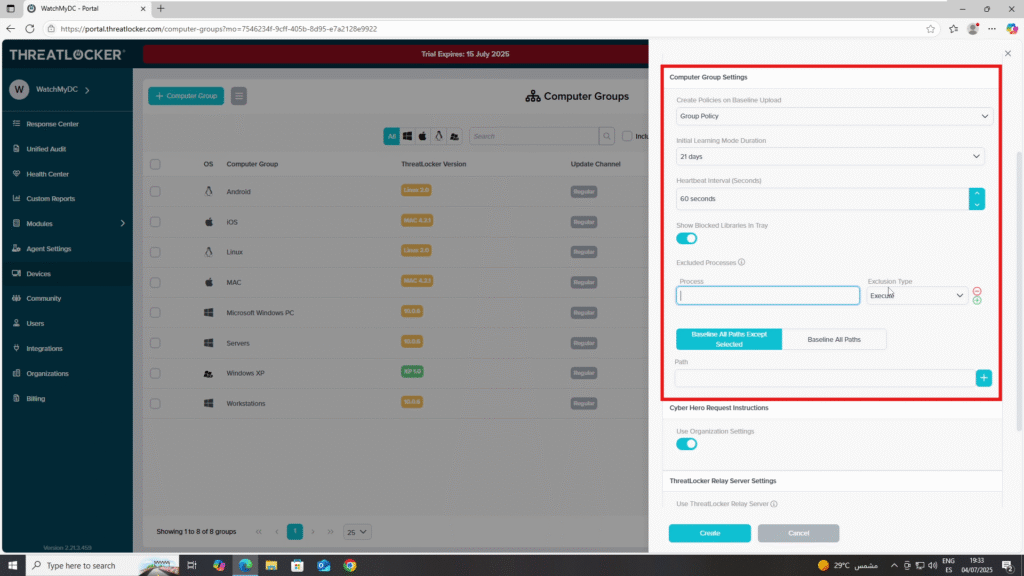
- Group Policy Options:
- Create Policies on Baseline Upload to Group Policy: Enable this to apply default rules
- Initial Learning Mode Duration – Set the duration (e.g., 21 days)
- Heartbeat Interval (seconds) – Enter the check-in interval (e.g., 60 seconds)
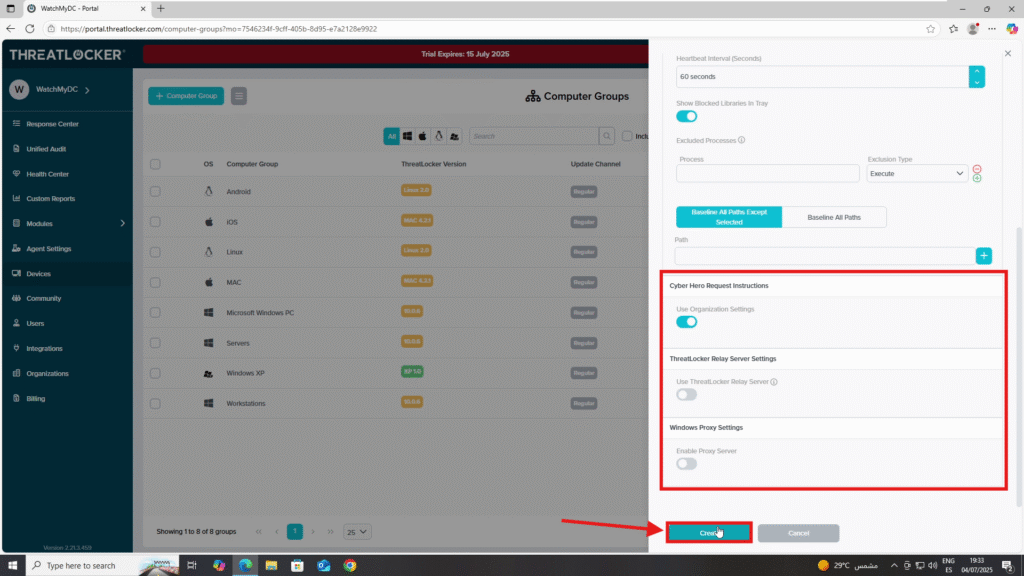
- In the Cyber Hero Server Settings:
- Enable “Use Organization Setting” unless you need a custom configuration
- In the ThreatLocker Relay Server Section:
- You may choose to enable or skip “Use ThreatLocker Relay Server” depending on your network setup
- In the Windows Proxy Settings Section:
- If needed, enable and configure a Proxy Server for outbound traffic
Once all fields are configured, click Create to complete the process.
Conclusion
Policy groups in ThreatLocker simplify large-scale device management and allow consistent enforcement of security settings across multiple endpoints.
By correctly configuring group settings such as learning mode and heartbeat intervals, you lay a strong foundation for secure and centralized policy control.
