How to create User Role in ThreatLocker?
This document outlines the step-by-step process of how to create user role in ThreatLocker Dashboard.
This article is a part of our ThreatLocker How-to Guides series, Chapter 09 – User and Device Management.
Introduction
Creating custom user roles in ThreatLocker allows you to define specific permissions for different types of users (e.g., guest users, auditors, junior admins). This gives you granular control over what each user can see and do in the portal.
Implementation
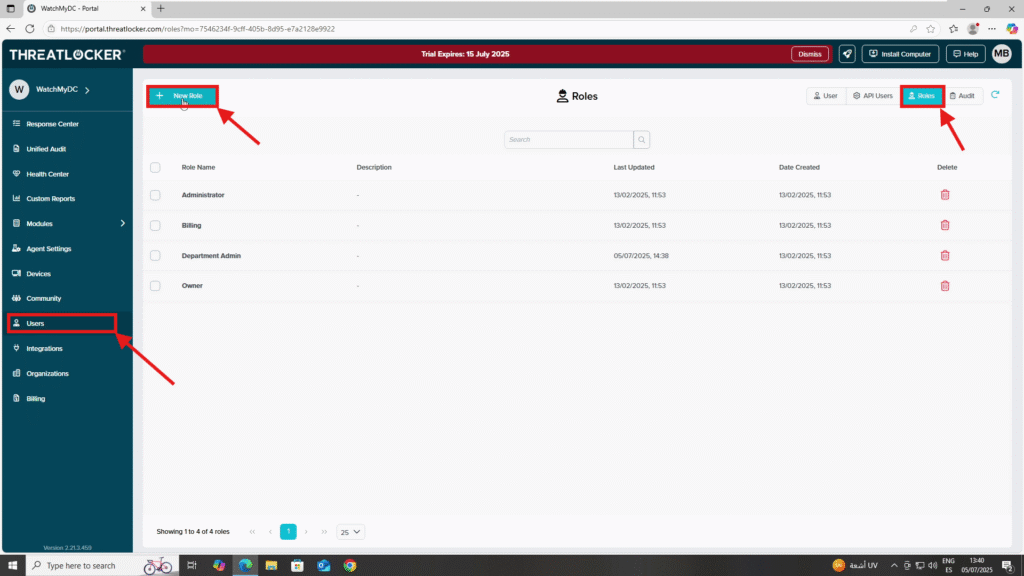
Step 1: Access the Role Management Section
- Log in to the ThreatLocker Portal.
- Navigate to Users > Roles
- Click New Role at the top of the page

Step 2: Fill Out the Role Creation Form
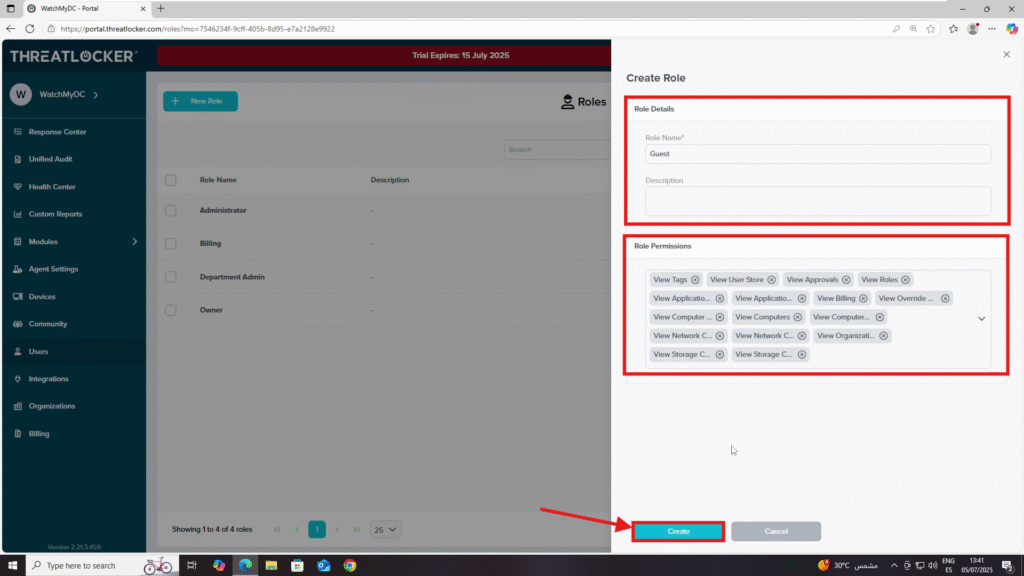
- After clicking New Role, a role creation window will appear.
- Fill out the form:
- In the Role Details section:
- Role Name: Enter a name for the role (e.g., Guest)
- Description: Provide a short description for the role
- In the Role Permissions section:
- Permissions: Select the permissions you want to assign to this role (e.g., View Roles, View Application Control, View Policies, Approve Requests)
Once the form is completed, click Create to finalize the role creation.

Conclusion
Creating a user role in ThreatLocker is essential for applying role-based access control. By assigning only the necessary permissions, you can enforce the principle of least privilege and better secure your environment.
