
How to deploy ThreatLocker using an RMM tool?
This document outlines the step-by-step process of how to deploy the ThreatLocker agent using an RMM tool like Atera.
This article is a part of our ThreatLocker How-to Guides series, Chapter 02 – Third-Party Software Installation & Configuration.
Introduction
What is an RMM Tool?
Remote Monitoring and Management (RMM) tools allow IT teams to manage, monitor, and deploy software across multiple endpoints remotely and efficiently.
Objective
This guide explains how to silently deploy the ThreatLocker agent using an RMM platform such as Atera, allowing you to install the agent remotely on multiple endpoints without user interaction.
Implementation
Step 1: Download the PowerShell Installer from the ThreatLocker Portal
Log in to the ThreatLocker Portal, then go to the Devices tab and click on “Install Computer”.
Select the appropriate Computer Group, then choose the PowerShell Script Installer from the available options.

Step 2: Choose the Operating System
In the Atera Portal, navigate to the Devices section. Select the workstations or servers where you want to install ThreatLocker, and click “Run Script” from the top toolbar.
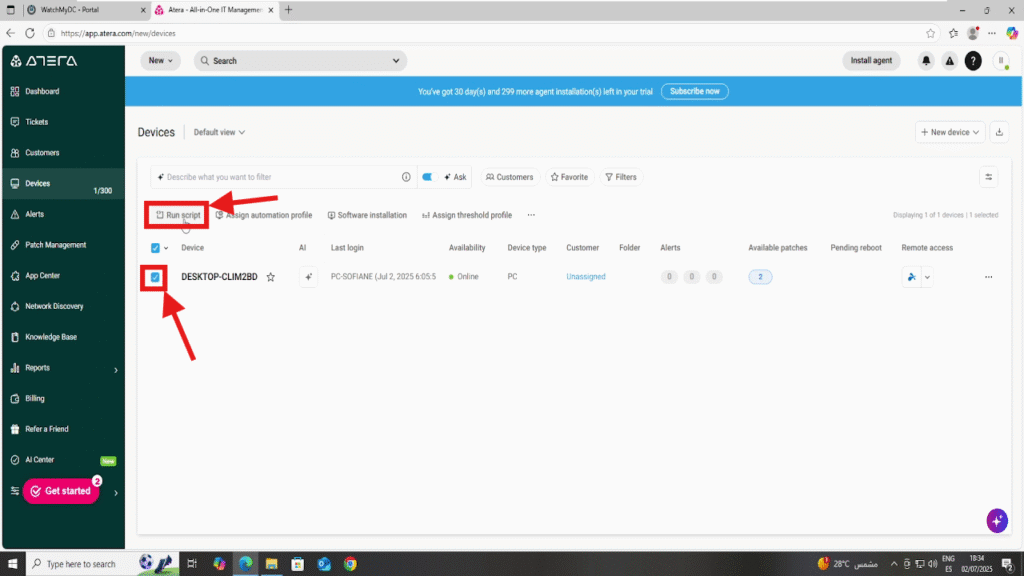
Note: The Atera agent must already be installed on the target machine(s) to execute scripts remotely.
Step 3: Create the ThreatLocker Deployment Script
In the Run Script window, click on “Create Script”.

Then, complete the following:
- Name the script (e.g., ThreatLocker Deployment)
- Choose PowerShell as the script type
- Paste the PowerShell installation script you downloaded from the ThreatLocker portal
Click “Create” to save the script

Step 4: Execute the Script on the Target Devices
- Return to the Run Script section in Atera.
- Select the target devices again, then locate the ThreatLocker Deployment script you created.
- Click “Run Script”, then confirm by clicking “Run” in the execution window.

Step 5: Confirm Installation in the ThreatLocker Portal
After a few minutes, go back to the ThreatLocker Portal > Devices tab.
The remote machine(s) should now appear as Active, confirming that the ThreatLocker agent has been successfully installed via Atera.

Conclusion
Deploying the ThreatLocker agent through Atera using the PowerShell script is a simple, scalable method to protect multiple endpoints remotely.By integrating the installer script into Atera’s script automation workflow, you reduce manual steps while ensuring that every targeted device is properly enrolled in the ThreatLocker Portal.
Once deployed, the agent begins monitoring and allows you to apply policies as part of your Zero Trust strategy, all without needing physical access to the machines.