How to enable network ringfencing in ThreatLocker?
This document outlines the step-by-step process of how to enable ringfencing in ThreatLocker Dashboard.
This article is a part of our ThreatLocker How-to Guides series, Chapter 06 – Network Control & Ringfencing.
Introduction
What is Network Ringfencing?
Network Ringfencing is a security technique that allows you to control how applications and devices interact with the network. In ThreatLocker, it allows administrators to define which network destinations an application or endpoint may communicate with, while blocking all others. This reduces the risk of unauthorized communication, stops lateral movement, and ensures that applications can only connect to trusted and approved network locations.
Objective
The objective of network ringfencing is to reduce the attack surface by restricting communications at the network level. It helps isolate endpoints and applications, limits exposure to external threats, and supports Zero Trust by enforcing strict communication boundaries. In this article, we will walk through the steps to create a basic inbound network control policy using ThreatLocker.
Implementation
Step 1: Access the Network Control Module
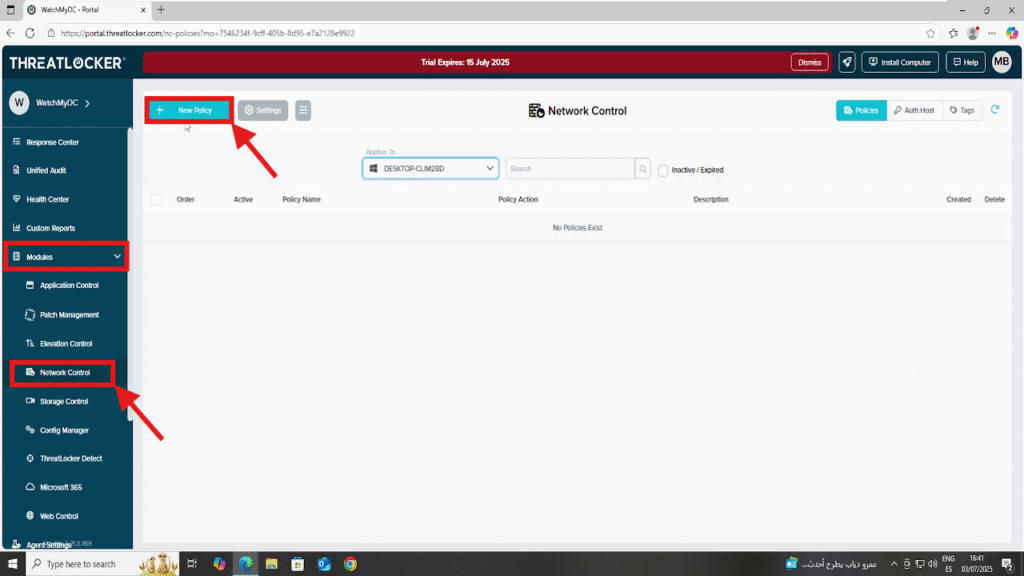
- Log in to the ThreatLocker Portal.
- Navigate to Modules > Network Control
- Click Create Policy
Step 2: Create the Network Control Policy
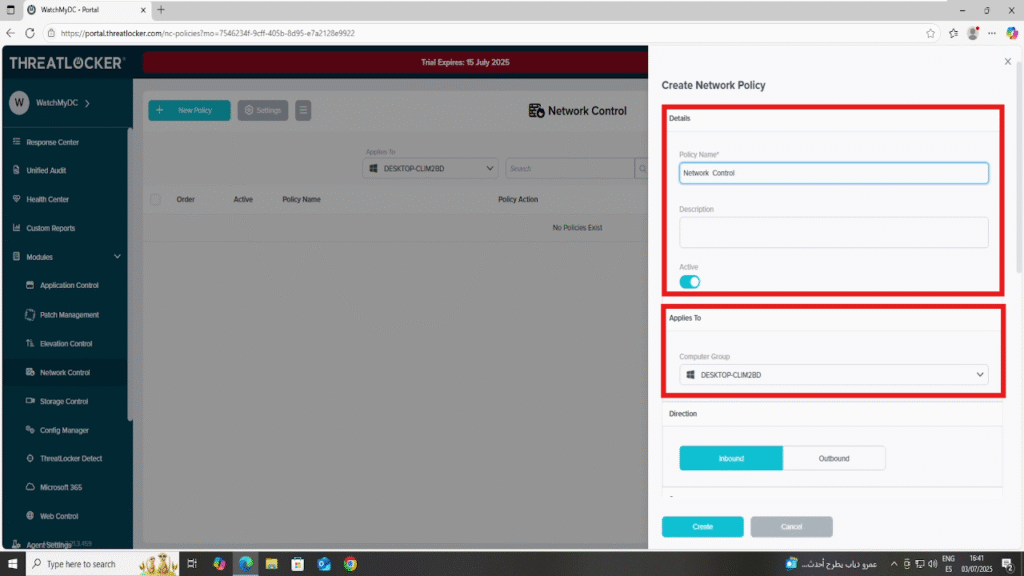
- Fill the policy form:
- In the Details section:
- Name: Network Control
- Description: Control network access for users
- In the Applied To section:
- Select the target computer or computer group where the policy should apply
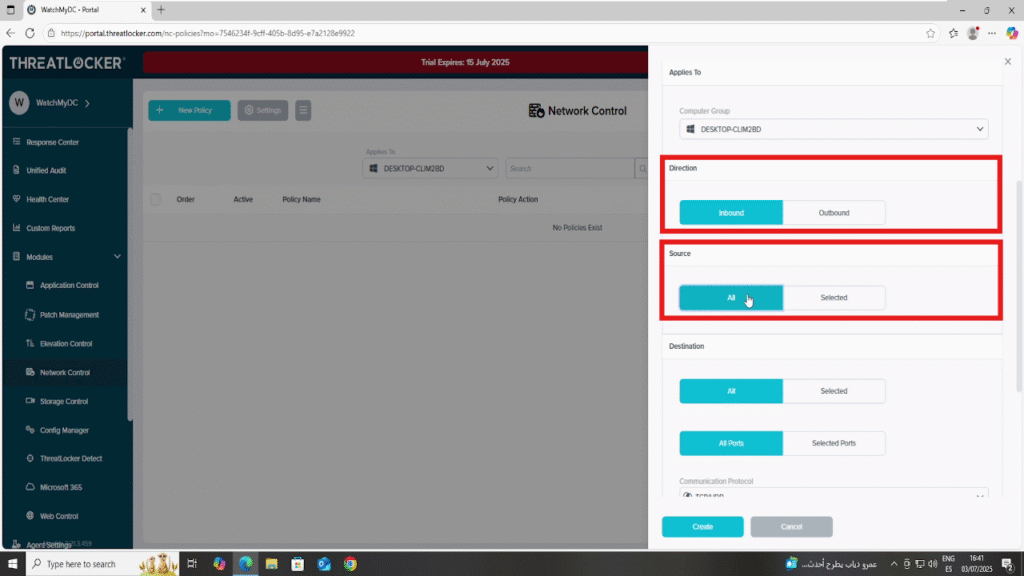
- In the Direction section:
- Choose the traffic direction
- In this example, select Inbound to control incoming connections
- Choose the traffic direction
- In the Source section:
- Select All or Selected
- If Selected, specify the domain, IP address, or hostname based on your needs.
- Select All or Selected
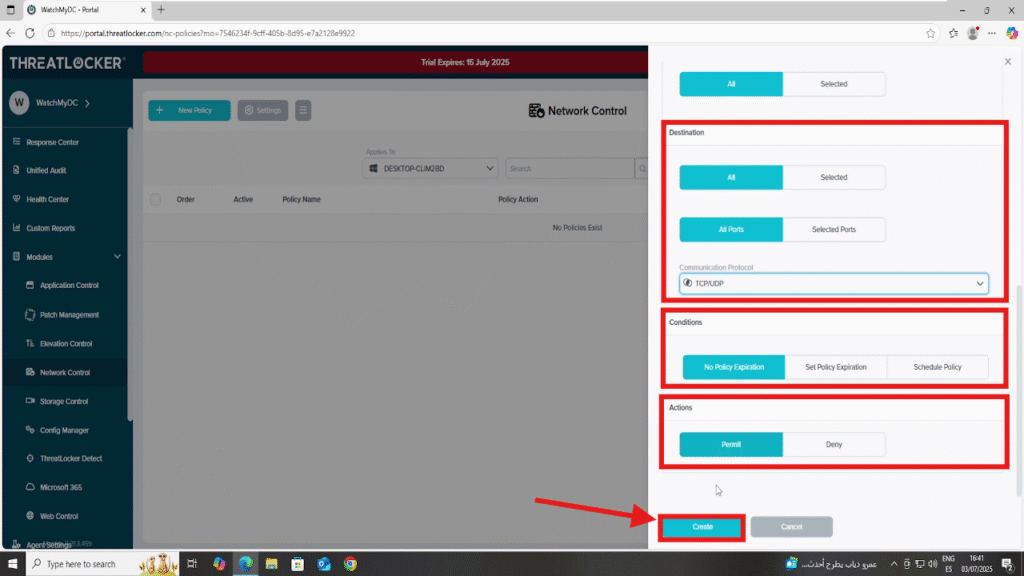
- In the Destination section:
- Select All
- Set Port to All
- Choose All Protocols (TCP/UDP)
- In the Condition section:
- Choose no policy expiration to apply the policy without an end date
- In the Action section:
- Select Permit as the action
2. Click Create to save the policy once all fields are completed
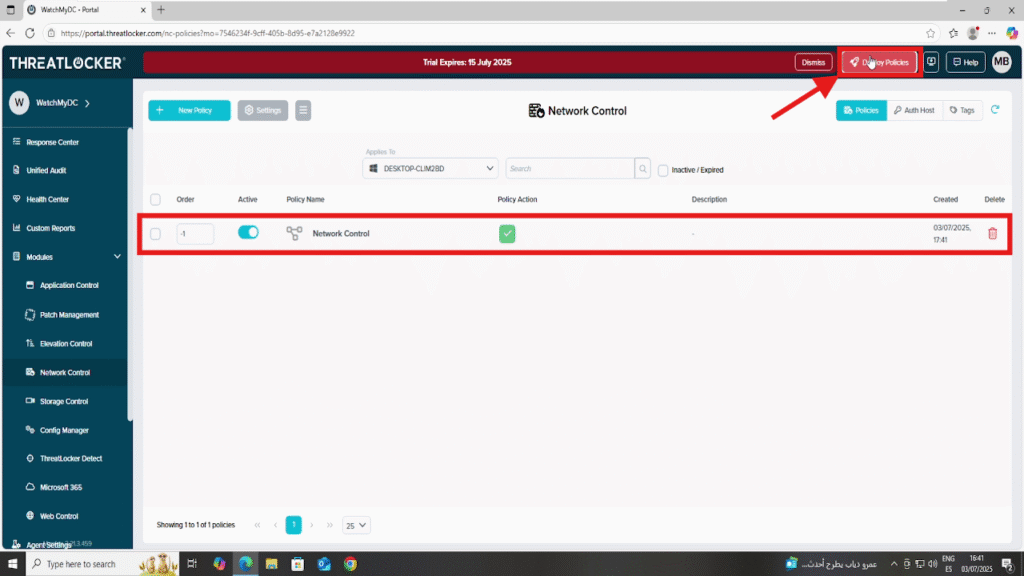
Step 3: Deploy the policy to enable network ringfencing in ThreatLocker
Conclusion
Network Ringfencing is a key component of a strong Zero Trust security strategy. By controlling which devices or applications can communicate over the network, you reduce the risk of unauthorized access, lateral movement, and data breaches.
With ThreatLocker Network Control, you can define precise rules for inbound or outbound traffic, based on trusted sources and destinations. This ensures that only approved communication is allowed, while everything else is blocked by default.
Implementing network ringfencing gives you greater visibility, control, and protection across your entire infrastructure, without compromising operational flexibility.
