How to add a new user in ThreatLocker?
This document outlines the step-by-step process of how to add a new user in ThreatLocker Dashboard.
This article is a part of our ThreatLocker How-to Guides series, Chapter 09 – User and Device Management.
Introduction
In ThreatLocker, adding new users is essential for managing who can access and administer security policies.
Each user can be assigned specific roles, permissions, and notification preferences to ensure secure and organized access management.
Implementation
Step 1: Access the User Management Section
- Log in to the ThreatLocker Portal.
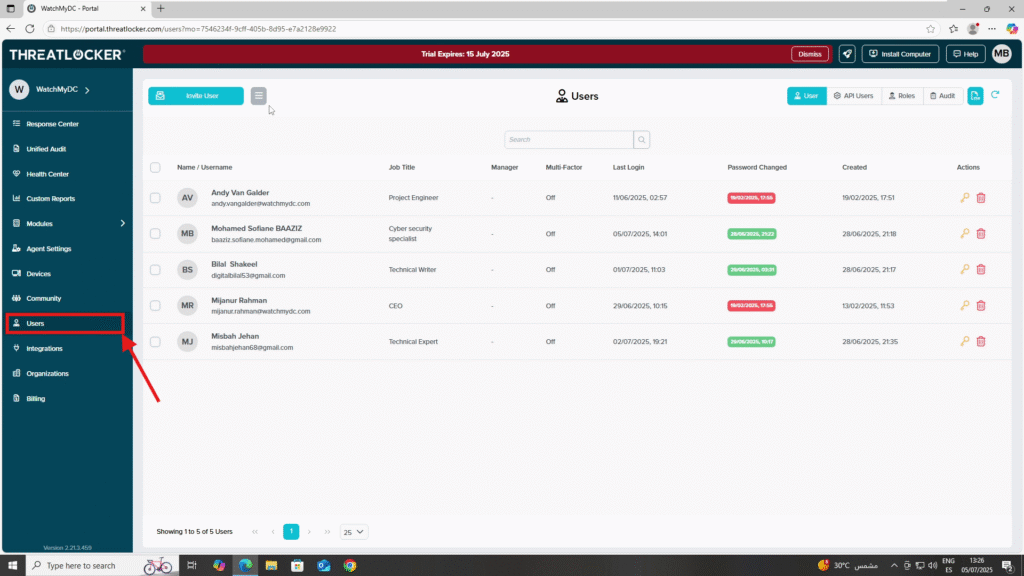
- Navigate to the Users tab from the left sidebar
- You’ll see a list of existing users with details such as:
- Job Title
- Last Login
- Password Changed Date
Step 2: Create a new user
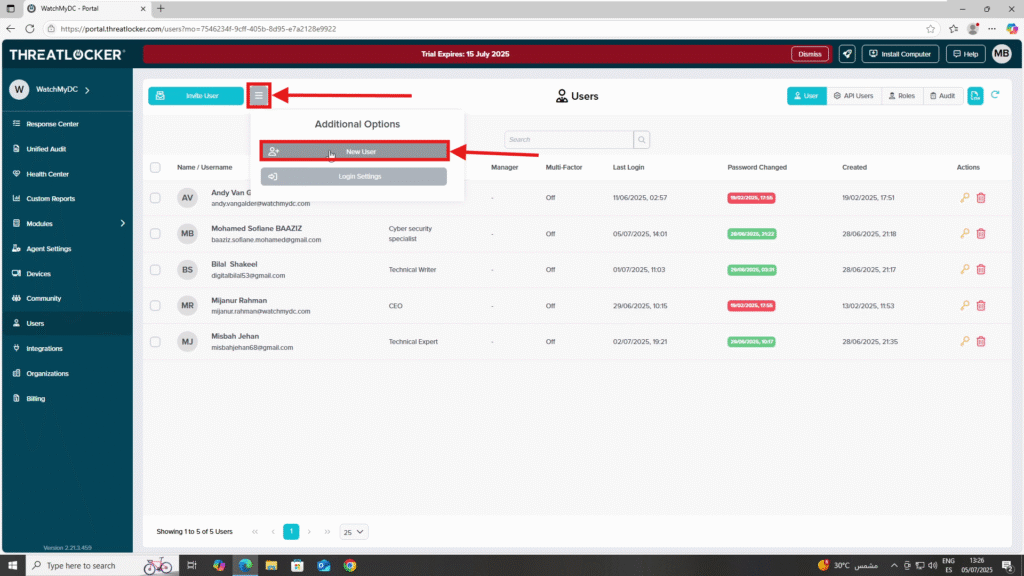
- In the Users section, click the three horizontal lines (≡) at the top of the page
- Click New User
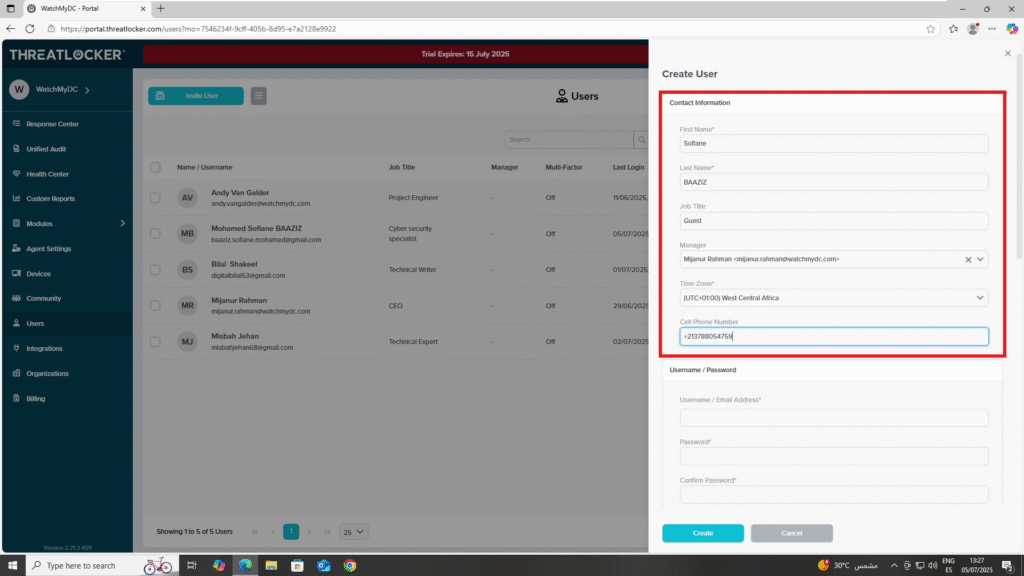
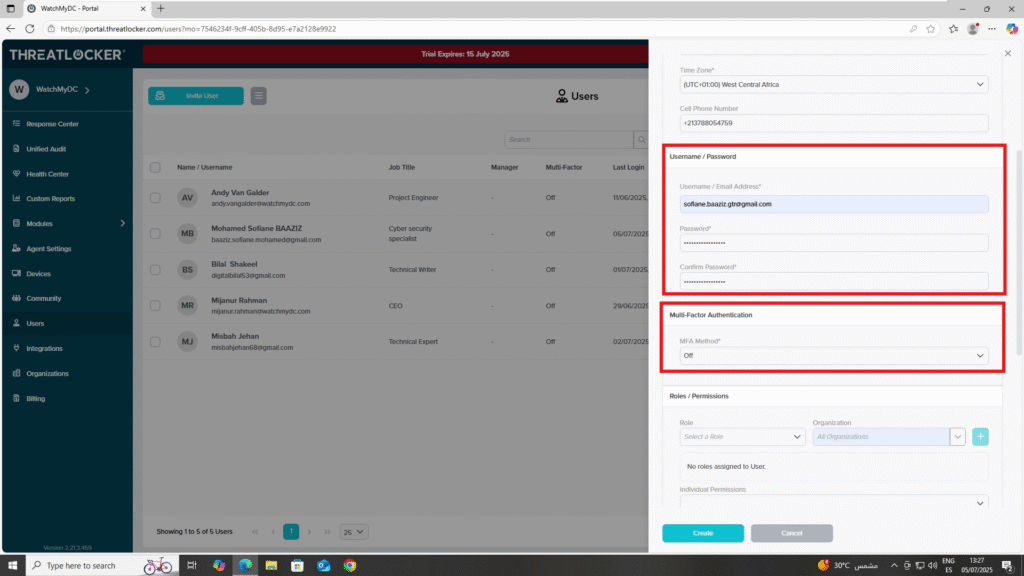
3. Fill Out the User Creation Form
- Contact Information
- First Name
- Last Name
- Job Title
- Manager
- Time Zone
- Cell Phone Number
- Username & Password
- Username / Email Address
- Password and Confirm Password
- Multi-Factor Authentication
- You can enable MFA to enhance account security
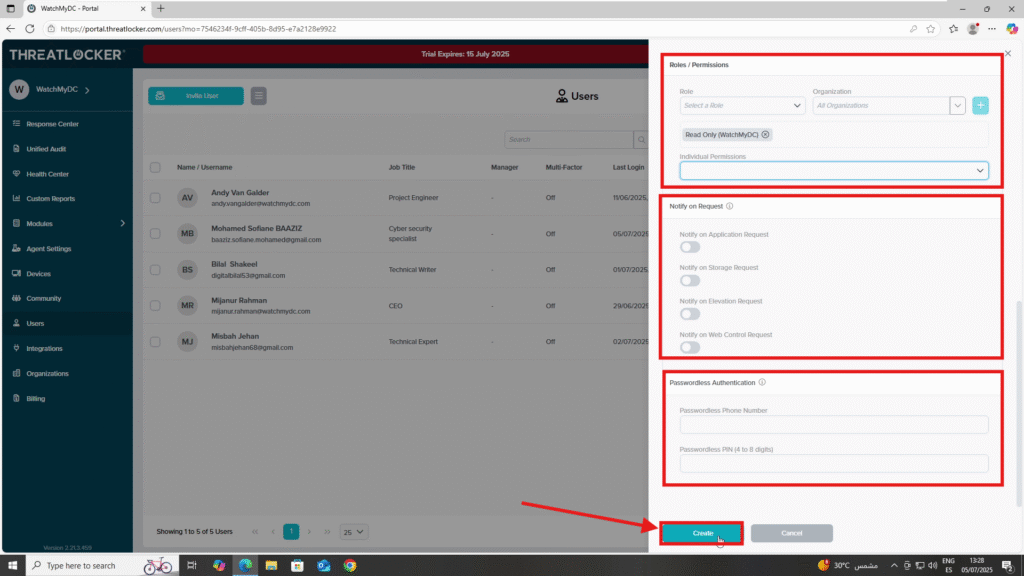
- Roles / Permissions
- Assign the user’s role and the organization scope
- Click the + icon to apply the role
- You may also assign individual permissions manually
- Notify on Request
Enable notifications to receive alerts when users submit:
- Application Requests
- Storage Requests
- Elevation Requests
- Web Control Requests
- Passwordless Authentication
- Add a mobile phone number for passwordless login
- Set a PIN (4 to 8 digits) for secure access
4. Once all required fields are configured, click Create to finalize the user setup.
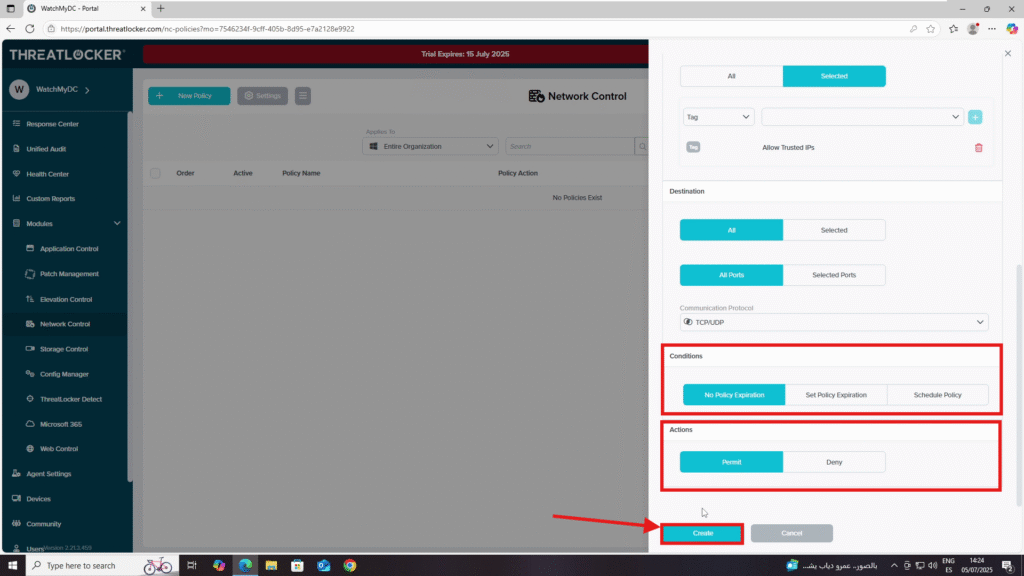
- Destination Section
- Select All
- Set Port to All
- Choose the protocol: TCP/UDP
- Condition Section
- Select No Policy Expiration
- Action Section
- Select Permit
When all fields are configured, click Create
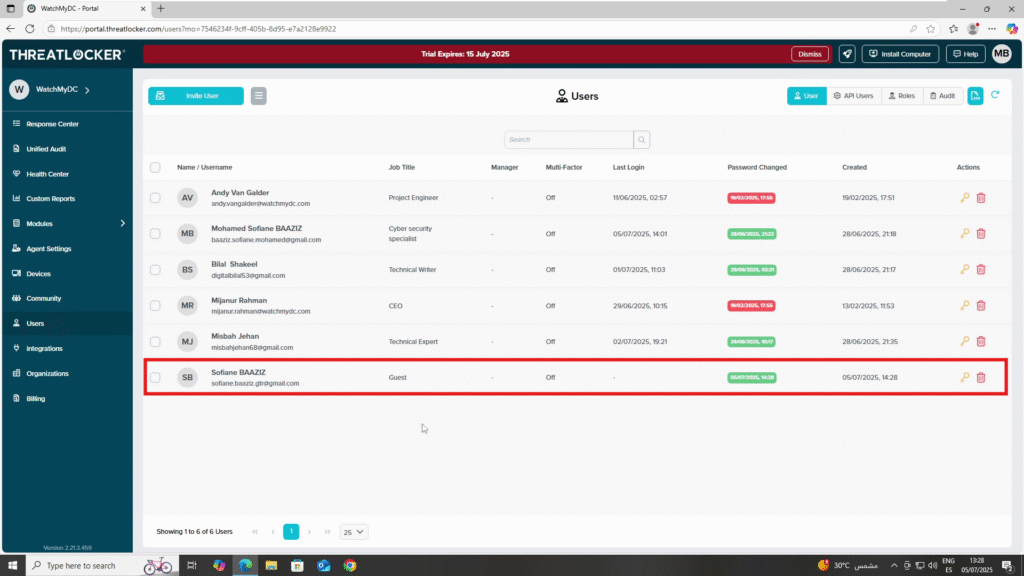
Step 3: the Final step
You will then see the new user appear in the user list with their details.
Conclusion
Creating a user in ThreatLocker ensures that only authorized individuals can manage or interact with system policies.
Properly assigning roles and notification settings enhances both usability and security.
