How to manage device groups in ThreatLocker?
This document outlines the step-by-step process of how to manage device groups in ThreatLocker Dashboard.
This article is a part of our ThreatLocker How-to Guides series, Chapter 09 – User and Device Management.
Introduction
Managing device groups in ThreatLocker allows you to organize endpoints by department, function, or policy requirements. This makes it easier to apply consistent security rules, track devices, and streamline administration.
Implementation
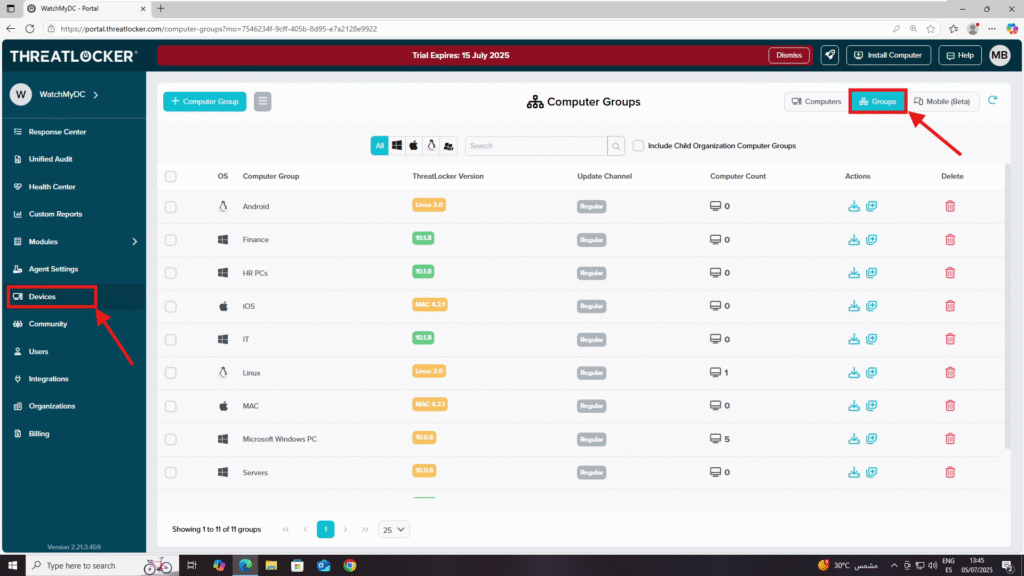
Step 1: Access the Device Groups Management Section
- Log in to the ThreatLocker Portal.
- Navigate to Devices > Groups
- You will see a list of all computer groups, including key information such as:
- OS type
- Group name
- Update channel
- Number of computers in each group
Step 2: Manage Computer Groups
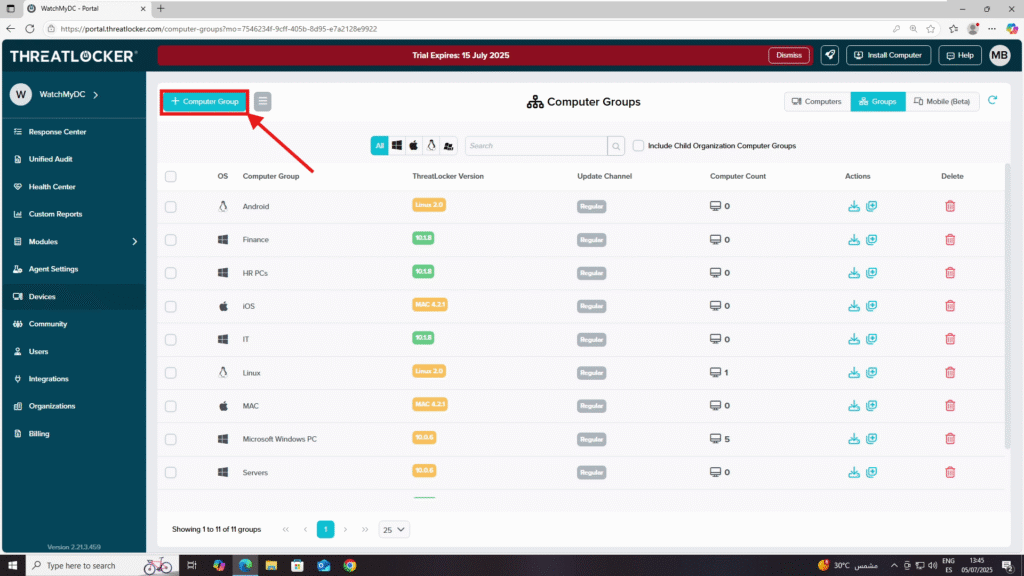
- Create a New Computer Group
- Click + Computer Group
- Complete the required fields to define the group’s configuration
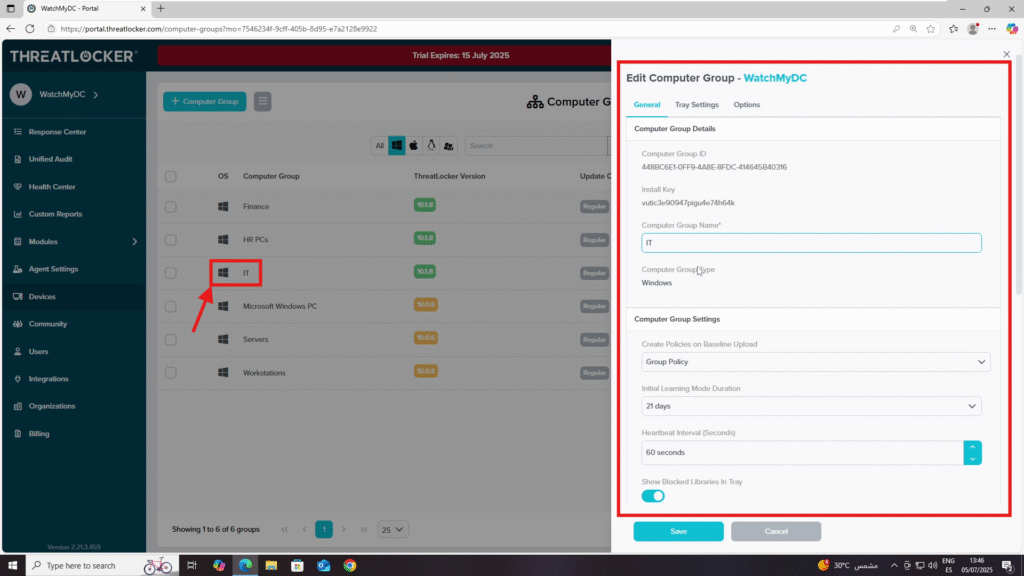
2. Edit Group Settings
- Click the icon next to the group name
- Modify the settings you want to change, such as:
- Group name
- Group policy settings
- Learning mode duration
- Update channel
- Heartbeat interval
3. Add Notes to a Group
- Click the note icon next to the group
- Add internal notes or comments
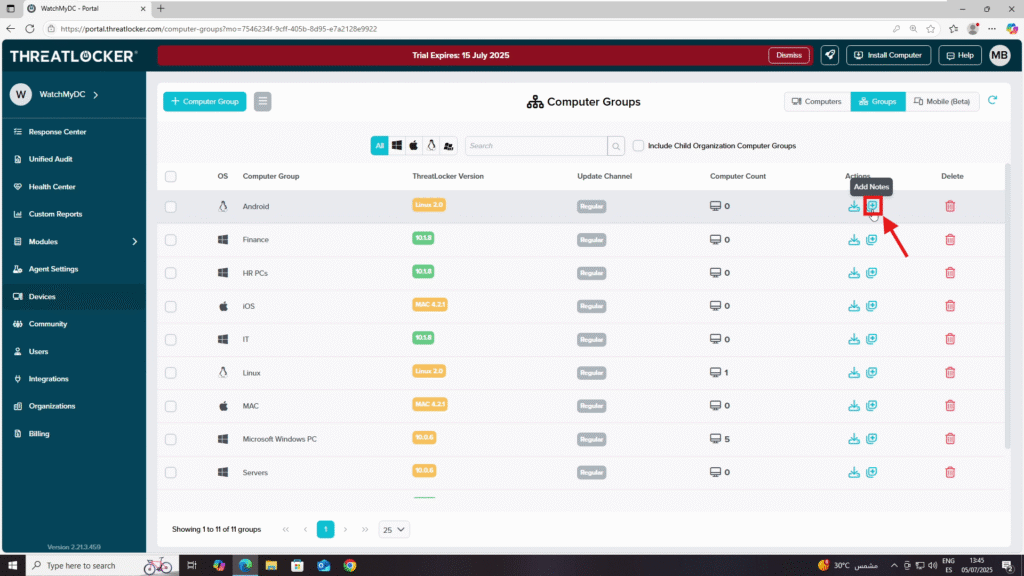
4. Download Agent Installer
- Use the download icon next to the group
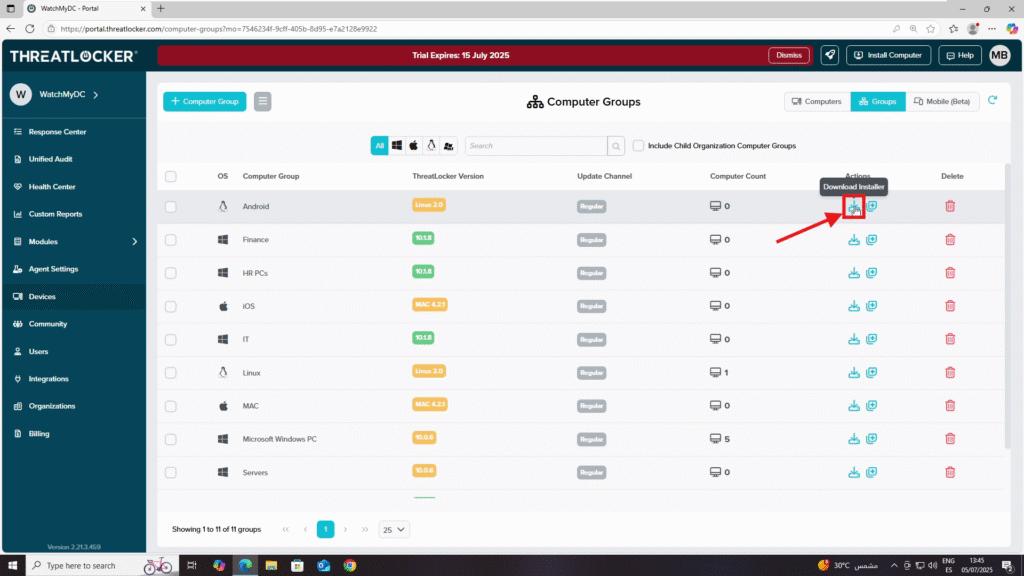
5. Delete a Computer Group
- Click the trash icon next to the group
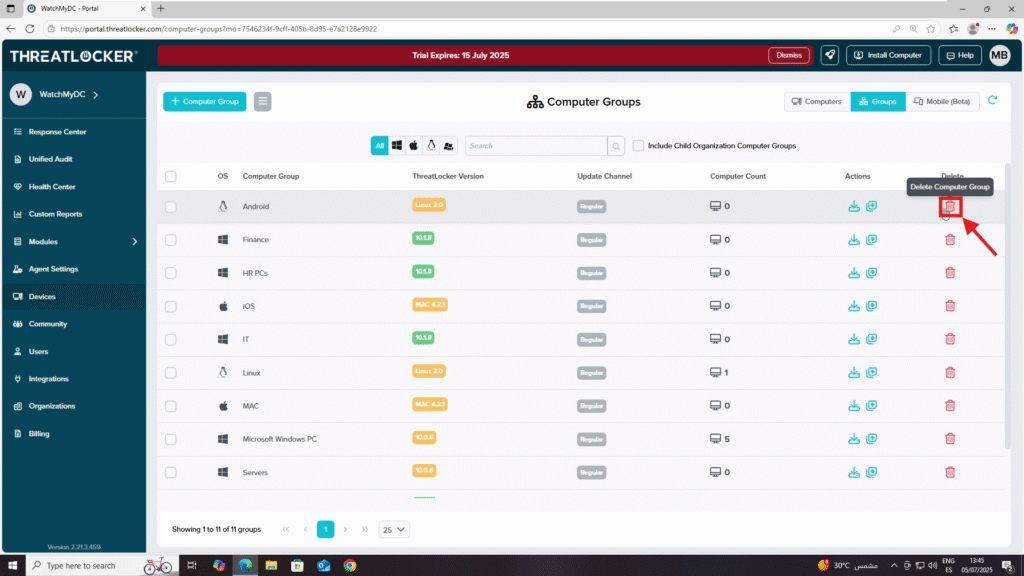
Conclusion
Managing device groups in ThreatLocker allows you to organize your endpoints by department, location, or function. From the Devices > Groups section, you can create, edit, or delete computer groups, add notes, and download the agent installer. This helps streamline policy deployment and maintain structured security management across your organization.
