
How to Modify Application Allow/Deny Policies in ThreatLocker?
This document outlines the step-by-step process of how to modify allow/deny policies in ThreatLocker Dashboard.
This article is a part of our ThreatLocker How-to Guides series, Chapter 03 – Zero Trust Policies (Application Control).
Introduction
In ThreatLocker, Application Control Policies determine which applications are permitted or blocked on your endpoints.
Situations may arise where you need to update an existing policy, such as modifying its scope, adjusting access rules, or enabling Ringfencing features.This guide provides a step-by-step process to help you safely modify existing Allow or Deny policies in a controlled and effective manner.
Implementation
Step 1: Access the Application Control Policies
Log in to the ThreatLocker Portal. Navigate to Modules > Application Control > Policies.
Here you will see a list of all active policies:

Step 2: Locate and Edit the Policy
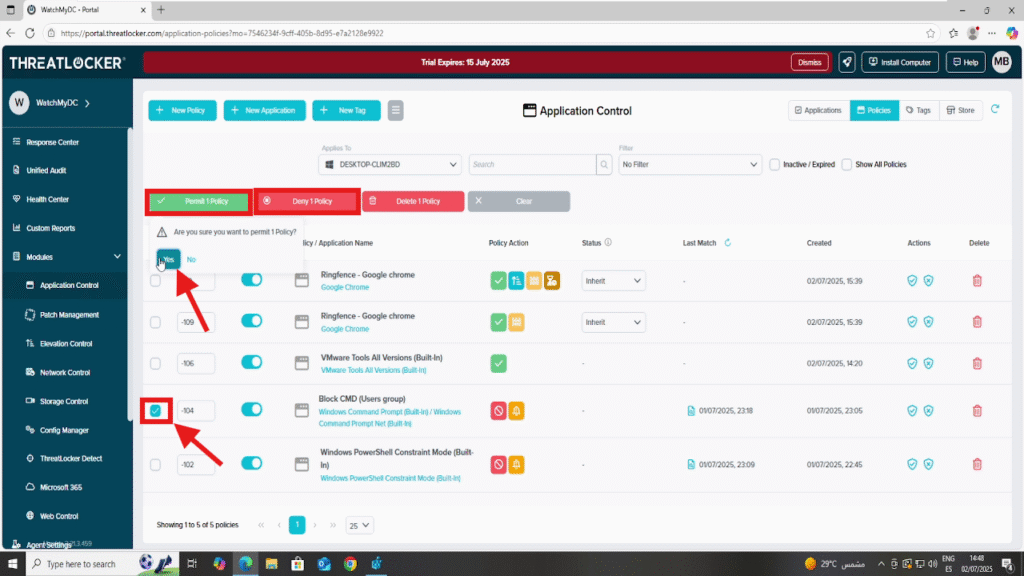
- In the policy list, locate the application policy you want to modify
- Select the policy, then click on “Permit Policy” or “Deny Policy”, depending on the new rule you want to apply.
- Confirm the action by clicking “Yes” when prompted
Step 3: Deploy the Policy To modify application allow/deny policies
After making your changes, click the “Deploy” button to apply the updated policy to all relevant endpoints.
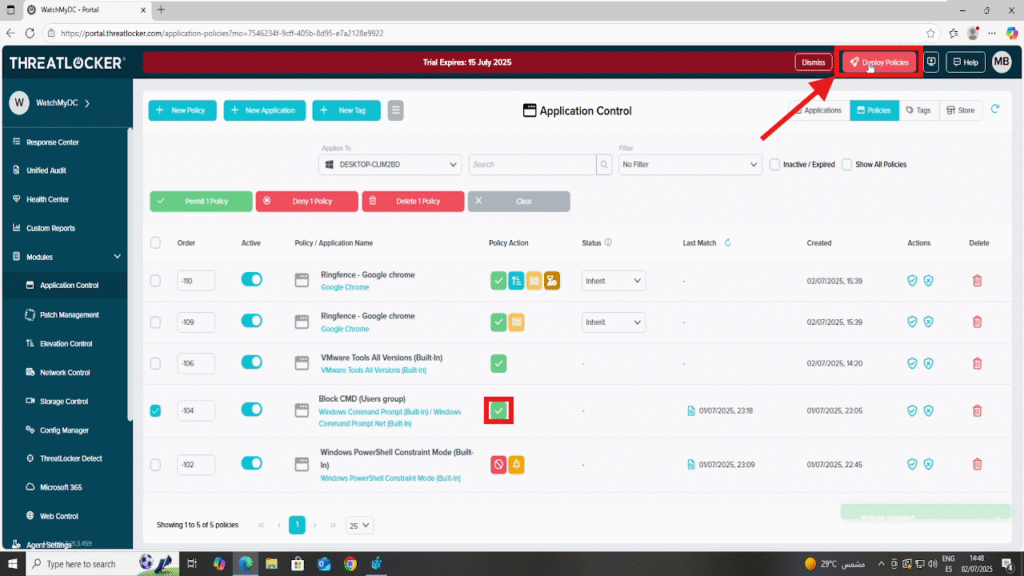
Once deployed, the policy will appear in the list of active policies.
Conclusion
Modifying application allow or deny policies in ThreatLocker helps maintain a secure and flexible environment.
Whether you’re adjusting access for a new tool, responding to a security alert, or refining existing rules, keeping policies up to date ensures your Zero Trust approach remains effective and responsive.