How to tag a policy and use it in a rule in ThreatLocker?
This document outlines the step-by-step process of how to tag a policy and use it in a rule in ThreatLocker Dashboard.
This article is a part of our ThreatLocker How-to Guides series, Chapter 08 – Policy Management.
Introduction
ThreatLocker allows you to create reusable tags (such as IP addresses or domains) that can be applied across multiple policies.
This improves efficiency and consistency, especially when managing network access control for trusted sources.
Implementation
Step 1: Create a Tag
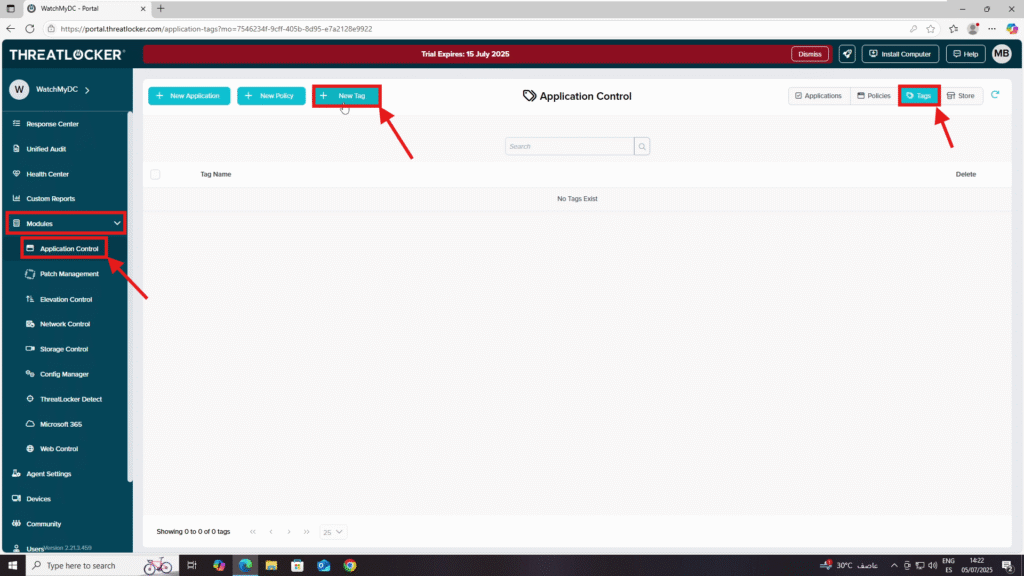
- Log in to the ThreatLocker Portal.
- Navigate to Modules > Application Control > Tags
- Click New Tag to create a new one
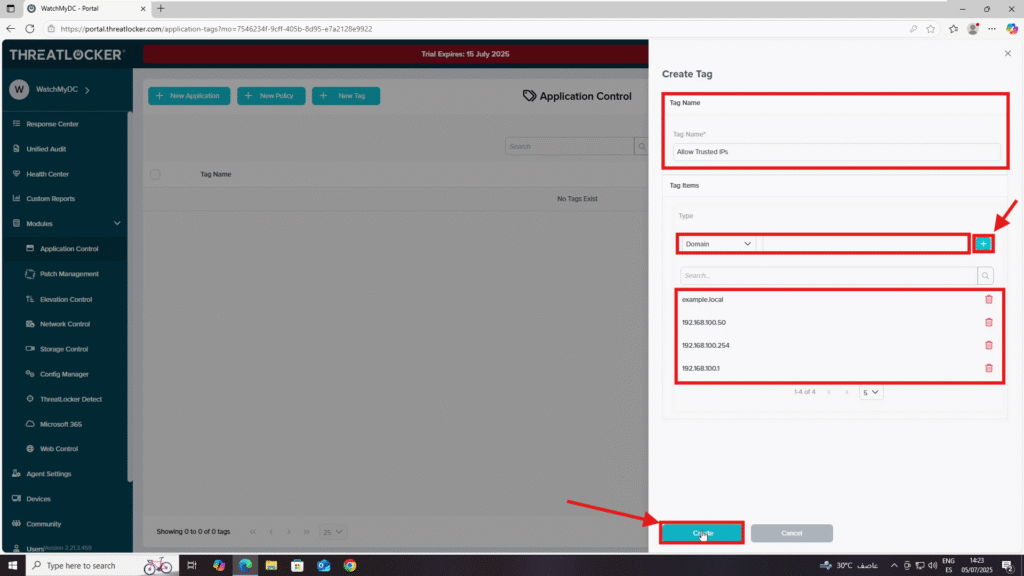
4. Fill out the Create Tag form:
- Tag Name: e.g., Allow Trusted IPs
- Tag Items:
- In the Type field, select Domain, IPv4, or IPv6
Add the trusted value and click +
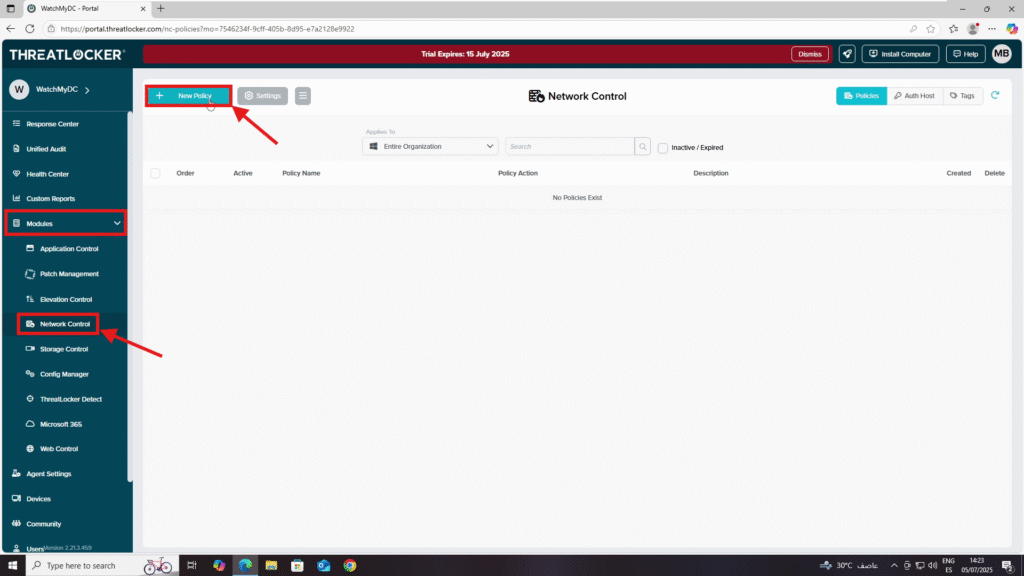
Step 2: Create a Policy Using the Tag
- Navigate to Modules > Network Control
- Click New Policy
3. Fill in the policy form:
- Details Section
- Policy Name: Allow Trusted IPs
- Description: Allow inbound network traffic only from trusted IP addresses defined in the tag “Allow Trusted IPs”.
- Applied To Section
- Select the target computer or computer group
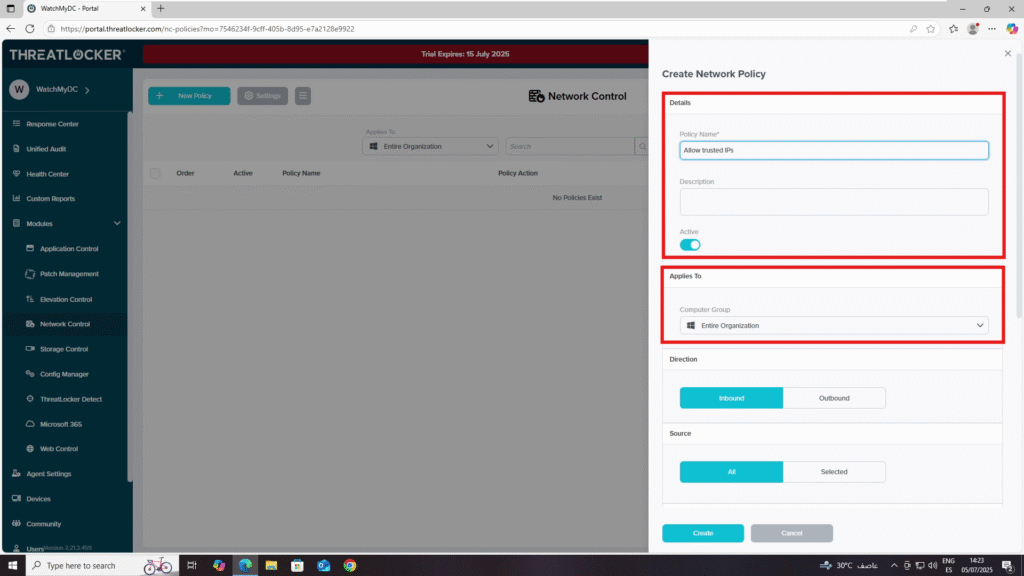
- Direction Section
- Choose Inbound or Outbound, depending on your need
- Source Section
- Choose Selected
- Select Tag
- Add the previously created tag: Allow Trusted IPs
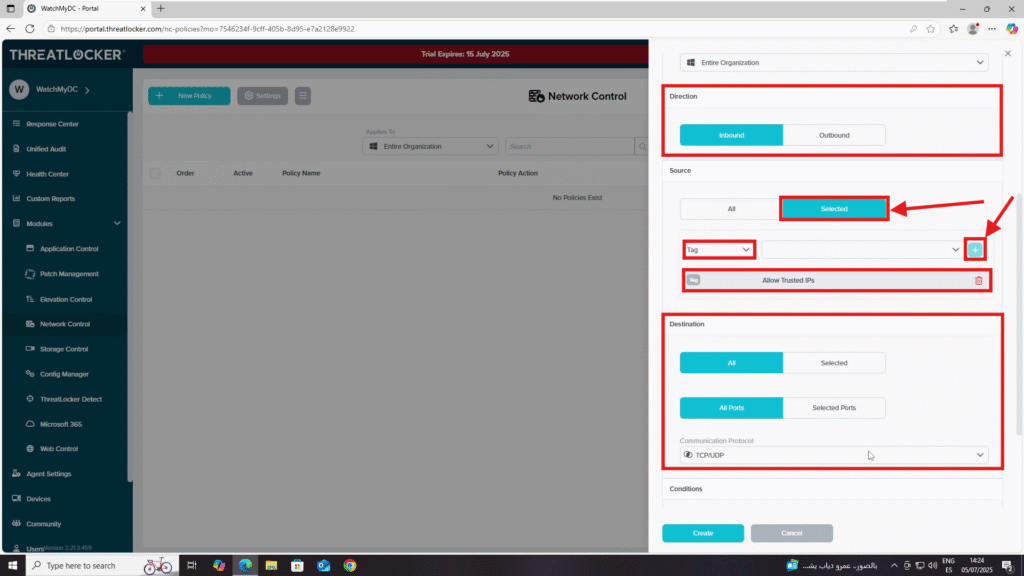
- Destination Section
- Select All
- Set Port to All
- Choose the protocol: TCP/UDP
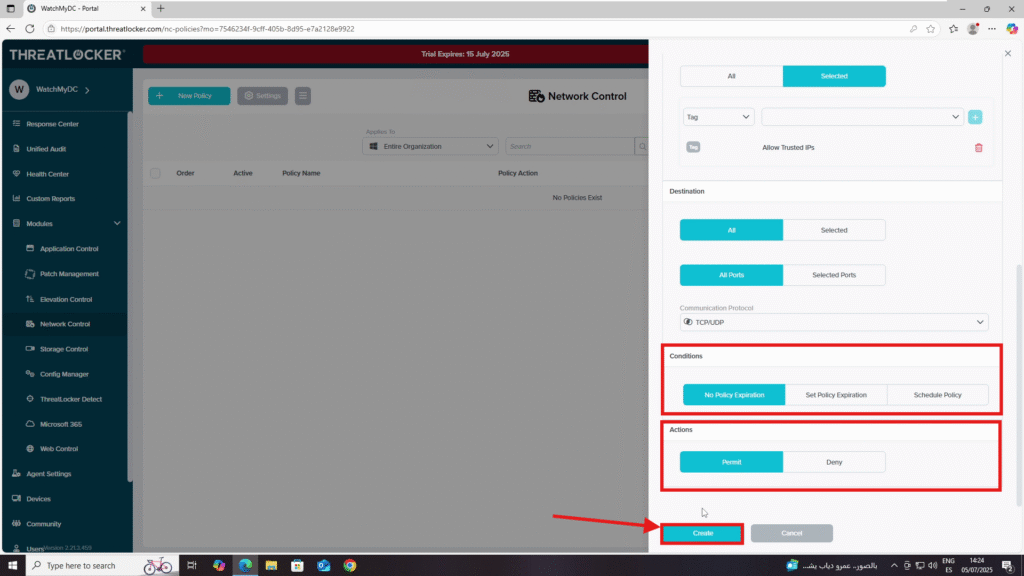
- Condition Section
- Select No Policy Expiration
- Action Section
- Select Permit
4. When all fields are configured, click Create
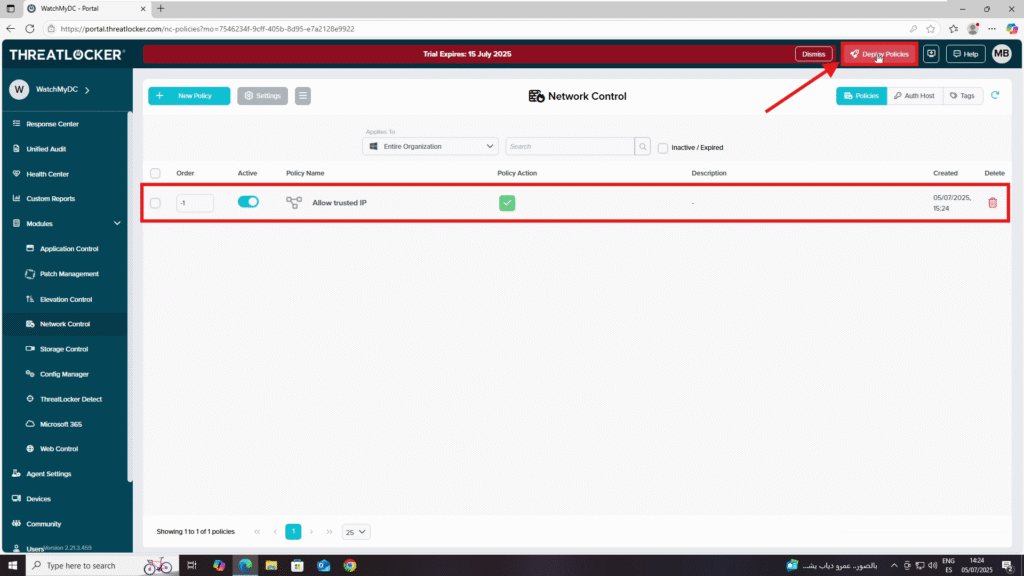
Step 3: Deploy to enforce changed to tag a policy and use it in a rule in ThreatLocker
Click Deploy to apply the policy
Conclusion
Using tags in ThreatLocker makes your policies easier to manage and update, especially when controlling access from specific IPs or domains.
By associating reusable tags with network rules, you ensure consistent enforcement while reducing manual configuration errors.
